• Object ID: 00000018WIA30602970GYZ
  • Topic ID: id_40025445 Version: 1.4
  • Date: Aug 18, 2022 2:17:24 PM

IDEAL: build a series in an existing protocol

About this task

Use this procedure to add the IDEAL Imaging Option to a series in an existing protocol to acquire multiple echoes resulting in water suppressed, fat suppressed, fat and water in-phase, and fat and water out-of-phase processed images.

Step-by-step instructions

  1. Open a Protocol session.
  2. From the Protocol screen, click the body part tab and select the desired protocol from the list to add an IDEAL series.
  3. Click Edit Protocol.
  4. From the Workflow Manager, select the series to which you want to add IDEAL and click Setup.
  5. Optional: To add "IDEAL" to the series name, select the series and right-click Rename, insert the cursor into the series name and type new text.
  6. From the Series Summary panel, click Imaging Options.
  7. From the Imaging Options screen, select IDEAL and any other compatible imaging options.
  8. Click More to view scan Mode and PSD selections.
    • 2D or 3D scan mode
    • IDEAL compatible pulse sequences:
      • FSE family and either 2D FSE or 2D FRFSE with Fast Recovery Imaging Option (FRFSE-XL)
      • Gradient Echo family and either 3D Fast GRE or 3D Fast SPGR
  9. Click Accept to close the Imaging Options screen.
  10. From the Protocol Edit Session Control panel, click the Coil tab and select an IDEAL compatible coil.
  11. From the Scan control panel, click the Patient Orientation icon and select the patient position and patient entry,
  12. Adjust the scan parameters, as needed.
    • In both 2D and 3D IDEAL acquisitions, the echo times to achieve fat and water suppression and the in and out of phase images are automatically adjusted based on your TE.
    • The shortest TE value is computed by the receive bandwidth, frequency resolution and frequency FOV parameters.
    • Typically, use the pre-IDEAL bandwidth and double it.
    • The IDEAL sequence acquires three acquisitions for all the data. Therefore the scan is equivalent to a 3 NEX scan. If your pre-IDEAL acquisition uses 6 NEX, with IDEAL select 2 NEX to get equivalent SNR.
    • Typical C-spine values: TR = 867, ETL = 3, RBW = 62.5, Frequency = 320, Phase = 256, NEX = 1, FOV = 24×24, Slice thickness = 3 mm, Spacing = 1 mm.
    • Typical knee values: TR = 4000, ETL = 12, RBW = 125, Frequency = 320, Phase = 256, NEX = 1, FOV = 16×16, Slice thickness = 3 mm, Spacing = 1 mm.
    • Typically, select 0.5 or 1 NEX. Typically, cut the pre-IDEAL NEX value by 33%. For example, if your pre-IDEAL protocol uses 1.5 NEX, enter 0.5 NEX.
  13. On the Scan Parameters screen menu bar, click the arrow in the upper right corner of the Scan Parameter screen to open the Details tab.
  14. From the Dixon tab, select the Dixon images you want reconstructed (in-phase or out-of-phase).
    Figure 1. Dixon selection area of Details tab
    • All IDEAL prescriptions have Fat and Water automatically selected and therefore they cannot be de-selected.
  15. Click the Graphic/SAT Rx icon 
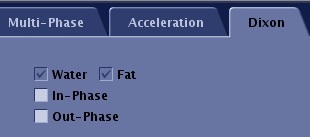
to open the Graphic Rx Toolbar.
  16. Click SAT and select spatial saturation pulses in the desired locations.
    • IDEAL is not compatible with chemical saturation but is compatible with spatial saturation.
  17. Type desired text in the Protocol Notes text area and click Save.
  18. Click Save Rx to add the IDEAL series.
  19. From the Workflow Manager menu, click Exam > Save as Protocol.
    • To close the Protocol Edit session without saving the protocol, click End > Close from the Workflow Manager menu or the Protocol Session tab.
  20. Scan the IDEAL series.