

- 00000018WIA3022B770GYZ
- id_400250281.3
- Feb 12, 2022 6:37:57 PM
Navigator: position the tracker
About this task
Use these steps to automatically place a Navigator tracker over the right hemi-diaphragm with body acquisitions. The tracker allows synchronization of the patient's breathing pattern to the acquisition technique thus reducing respiratory ghosting artifact.
Step-by-step instructions
- From the Workflow Manager, select a 3Plane Localizer SSFSE task. SSFSE 3Plane Localizer with Supine considerations:
- The SSFSE 3Plane Localizer must have a Supine patient orientation.
- Do not use Tailored RF Imaging Options because it can result in heart shading that can cause misplacement of the Auto Tracker.
- To achieve appropriate image contrast for the Auto Tracker, enter a TE value from 80-120 ms.
- Acquire at least one coronal and axial localizer image through the center of the thorax. Both the lung and liver should be visible on the coronal image.
- Do not include the edge of the upper shoulder in the localizer coronal image, in particular with small patients. Including the shoulder in the FOV can result in Auto Tracker errors. Always check the tracker placement on small patients.
Figure 1. Red box indicates appropriate localizer FOV position that excludes shoulders 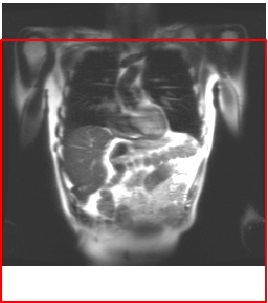
- Large patient and coil configuration automatically generated for the localizer issue: shading can result in misplacement of the Auto Tracker. The Auto Tracker mistakes the right side of the liver due to coil receiver sensitivity that results in inhomogeneity and image shading. Review the coronal localizer and if shading is present, manually place the tracker.
- Auto Navigator tracker placement does not support anatomical abnormalities such as situs inversus, hepatic resection, etc. In these instances, manually place the navigator tracker.
Figure 2. Note shading by the liver caused by incorrect coil configuration 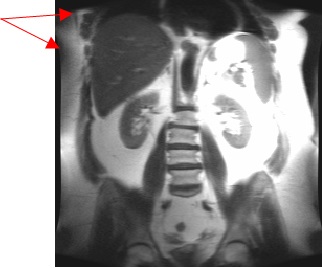
- From the SSFSE Localizer scan parameter screen, select the Breath Hold option that will match the Localizer scans. The Breath Hold option is required by Auto Tracker Placement Post Processing Task so that it can calculate the tracker position .
Figure 3. Breath Hold menu 
- Add a post processing task.
- Click .
- Click Auto Tracker Placement.
- Click Setup top open the Auto Tracker Placement screen.
- Click Automatic option box if it is not already selected.
- Click Accept.
Figure 4. Auto Tracker Placement screen 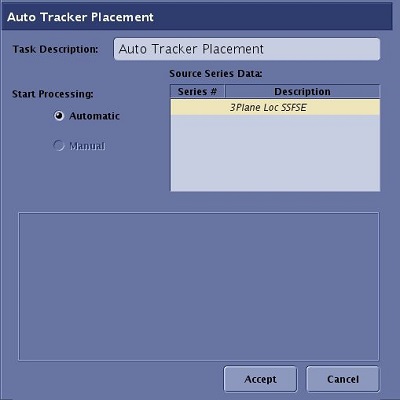
- From the GRx toolbar:
- Click Tracker.
- Click the Auto Tracker option.
Figure 5. Grx toolbar 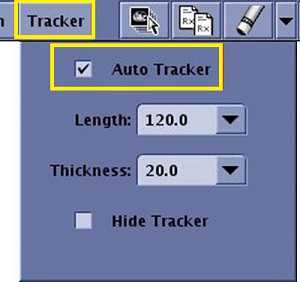
- The tracker position is automatically placed on the localizer based on the Auto Tracker Placement post-processing application.
Figure 6. On the coronal localizer, the tracker center is placed over the dome of the liver 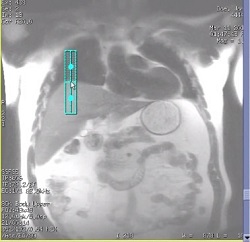
Figure 7. On the axial localizer, the tracker is placed in the middle of the liver in the anterior/posterior direction 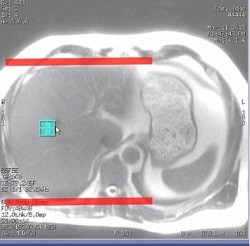
- The tracker position is automatically placed on the localizer based on the Auto Tracker Placement post-processing application.
- From the GRx toolbar:
- Click Tracker.
- Adjust the Tracker length and thickness to fit the patient size.
- The tracker should not overlay the thoracic wall nor the heart. It should not extend to the bottom edge of the liver.
Figure 8. Tracker placement for Breath Hold selection Inspiration 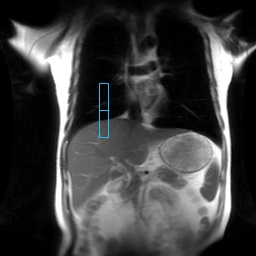
Figure 9. Tracker placement for Breath Hold selection Middle 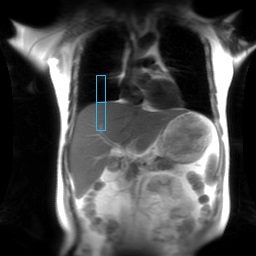
Figure 10. Tracker placement for Breath Hold selection Expiration 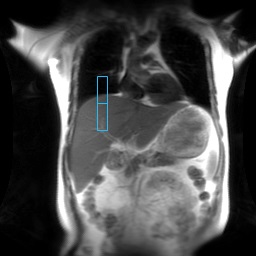
- The tracker should not overlay the thoracic wall nor the heart. It should not extend to the bottom edge of the liver.
- To manually move the tracker on the localizer, follow these steps to adjust the tracker position if you believe it is not in the optimum location. The tracker cannot be moved if Auto Tracker is selected.
- From the GRx toolbar:
- Click Tracker.
- De-select the Auto Tracker option.
Figure 11. De-selected Auto Tracker option 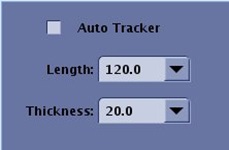
- Reposition the tracker on the coronal image and center it on the liver dome.
- Reposition the tracker on the axial image and place the tracker in the middle of the liver in the anterior/posterior direction.