From the Workflow Manager, click Add Task > Add Sequence.
From the Protocol screen, select a MP-RAGE protocol from your site or GE library.
At a minimum, include a localizer and MP-RAGE series.
If you cannot locate a MP-RAGE protocol in either library, then from the Protocol screen:
From the GE protocol library, click the Template tab.
Click the Applications folder.
From the Applications list, click MP-RAGE and add it to the Multi-Protocol Basket.
Click Accept.
Acquire a 3-Plane localizer.
From the Workflow Manager, select the MP-RAGE series and click Setup.
Make scan parameter adjustments, as needed.
IR Prepared defaults to an on state. For optimum image quality, it is critical that IR Prep remains on for non-contrast enhanced series.
Use PROMO to correct for rigid head motion. PROMO requires a minimum (~1 second) Recovery Time to collect the 3-plane navigators used for motion estimation.
Typically use the flip angle from the GE protocol to optimize image quality.
From the Details screen, select a Recovery Time, which is a delay added between two IR prep pulses after the acquisition segment. The recovery time allows more signal to recover and thus helps in improving the CNR and SNR. Note that scan time increases as the Recovery Time value is increased. The GE protocols have been optimized to balance image quality with an appropriate scan time tradeoff. Note that Recovery Time has no effect on spatial resolution.
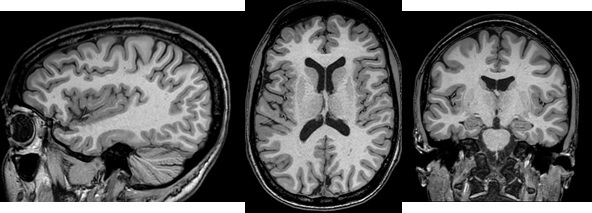
From the Details screen, select a Prep Time, which is the time between the inversion pulse and the center of k-space. The selected value affects CNR. Note that the GE protocols have scan parameters including the Prep Time that have been optimized for image contrast. Figure 1. MP-RAGE head images
Acceleration in the slice direction may lead to suboptimal SNR and CNR and result in less scan time reduction than acceleration in the phase direction.
Warning
With post-contrast imaging using inversion-prepared pulse sequences, there is a potential that lesion conspicuity may be reduced and some lesions may not be apparent in comparison to T1-weighted spin-echo imaging.
Use ARC to reduce scan time if the Imaging Option is available with the selected coil.
Although MP-RAGE supports multi-slab prescription, single slab is recommended for whole brain coverage with MP-RAGE.
To avoid through-plane shading near the superior slab border on sagittal and coronal reformatted images from axial source images, position the superior slab border well outside the head. Alternatively, select NONE from the Intensity Correction menu.
For sagittal and coronal planes, consider selecting Excitation Mode: Non-Selective. For details, see Excitation Mode.
Click the Advanced tab and make adjustments as needed.