

- 00000018WIA30F30970GYZ
- id_400253001.6
- May 4, 2022 6:59:06 AM
BRAVO
About this task
Use these steps with a compatible head coil to acquire whole-brain isotropic volumes in 3 to 4 minutes with ARC, reducing the total fMRI exam length by as much as 40%.
Step-by-step instructions
- Make scan parameter adjustments, as needed.
- IR Prepared defaults to an on state. For optimum image quality, it is critical that IR Prep remain on for non-contrast enhanced series.
- Recovery Time: use a combination of TI and recovery time value to get a white matter nulled brain images (use the values in the GE protocol: FA = 8, TI = 400 and adjust recovery time such that Temp Resolution = 3 seconds). Note that the minimum and maximum values are displayed as a tool tip when you hover the mouse over the Recovery Time field.
- From the Details screen, select a Prep Time, which is the time between the inversion pulse and center of k-space. The selected value affects CNR. Note that the GE protocols have scan parameters including the Prep Time that have been optimized for image contrast.
Figure 1. White matter nulled brain image 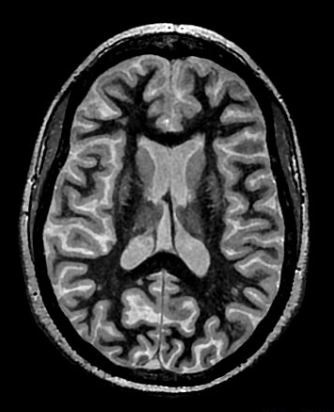
- Acceleration in the slice direction may lead to suboptimal SNR and CNR and result in less scan time reduction than acceleration in the phase direction.
Warning
- Acceleration in the slice direction may lead to suboptimal SNR and CNR and result in less scan time reduction than acceleration in the phase direction.
- Use ARC to reduce scan time if the Imaging Option is available with the selected coil.
- Use PROMO to correct for rigid head motion. PROMO requires a minimum (~1 second) Recovery Time to collect the 3-plane navigators used for motion estimation. The increase in Recovery Time requires an adjustment of the Prep Time (TI) to achieve the desired image contrast (CSF nulled or white matter nulled).
- Although BRAVO supports multi-slab prescription, single slab is recommended for whole brain coverage with BRAVO.
- To avoid through-plane shading near the superior slab border on sagittal and coronal reformatted images from axial source images, position the superior slab border well outside the head. Alternatively, select NONE from the Intensity Correction menu.
- For sagittal and coronal planes, consider selecting Excitation Mode: Non-Selective. For details see, Excitation Mode.