

- 00000018WIA30681970GYZ
- id_400257651.4
- Mar 3, 2022 1:40:19 PM
Multi Station: set up for a peripheral exam
About this task
Use these steps to set up a Multi Station series for a peripheral run-off exam.
Multi-Phase with multi-station and QuickSTEP
If Multi-Phase is selected, it only applies to Arterial Phase acquisition. Mask and Venous phases remain as single phase scans.
Step-by-step instructions
- The Multi Station tab displays. Make parameter adjustments, as needed and click Save Rx.
Figure 1. QuickStep and Multistation Task screen 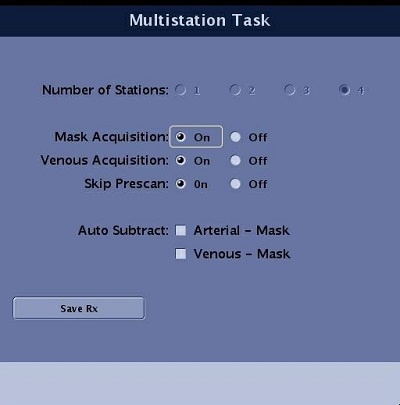
- Number of Stations = 3 or 4
- The Number of Stations does not appear on the Multi Station tab if the protocol is pre-built and loaded into the Workflow Manager from the Site or GE library. Therefore, you are not able to change the number of stations. This is expected behavior for pre-built multi-station protocols and Copy/Pasted multi-station protocols. The only time this selection appears is when you are building a protocol.
- Mask Acquisition = On (optional)
- Venous Acquisition = On (optional)
- Multi-phase selection only applies to Arterial phase and only a single phase is collected with Mask and Venous acquisitions. You can use all three acquisition types within the same examination series. Perform a Mask acquisition when performing a CEMRA exam to ensure correct volume placement when post processing subtraction is performed.
- When Skip Prescan is On, it means that prescan data is only acquired from the top station and the other stations have the prescan values calculated from the first station. Skip Prescan is Off acquires prescan data from each station.
- Auto Subtract selections automatically generate subtracted images.
- Number of Stations = 3 or 4
- From the Workflow Manager, click the folder icon to open or expand the Multi Station series. Select each sub-task, click Setup and make scan parameter adjustments to each series.
Figure 2. Folder icon open displays sub-series 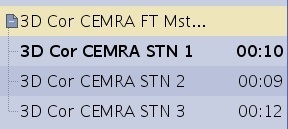
- Patient Position: Coil = Body, Description = 3D Cor CEMRA STN 1
- For more details on coil selection, see Multi Station: acquire a localizer scan.
- Imaging Parameters: Plane = Oblique, Mode = 3D, Pulse Seq. Family = Vascular, Pulse Sequence = Fast TOF SPGR, Imaging Options = Multi Station, ZIP 512, and either SmartPrep or Fluoro Trigger
- If an ASSET compatible coil is selected, ASSET can be selected and it will only be applied to the first station.
- The second and later stations are acquired with ASSET turned off.
- Scan Timing: TE = Minimum, Flip Angle = 30
- Scanning Range: FOV = 46 to 48, Slice Thickness = 2.4 to 2.8, Scan Locs = 32 to 40
- Frequency and Phase range= 32 to 512
- NEX = 1
- Phase FOV range 0.5 to 1.0.
- Shim = Auto
- Contrast = enter amount and type
- Patient Position: Coil = Body, Description = 3D Cor CEMRA STN 1
- From the Graphic Rx toolbar, click the
 .
.