

- 00000018WIA3013C770GYZ
- id_400258321.5
- Apr 14, 2022 9:33:22 AM
MAGiC: post-process use SyMaps® to display measured values
About this task
Use the SyMaps® to display the measured values for tissue properties per voxel. The quantitative/parametric maps T1, T2 and PD are the foundation of synthetic MRI. In addition to the relaxation times T1 and T2 the corresponding relaxation rates R1 and R2 are available.
Step-by-step instructions
- From the SyMaps menu, make a selection.
Figure 1. SyMaps menu 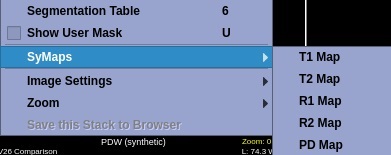
Table 1. SyMaps® selections SyMaps® selection SyMaps®selection Click T1 Map and the T1 relaxation times are displayed in ms. Interval of measurements: 300 - 4300 ms 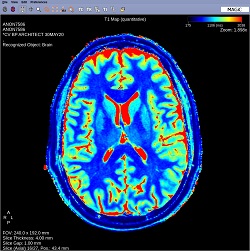
Click T2 Map and the T2 relaxation times are displayed in ms. Interval of measurements: 20 - 2000 ms 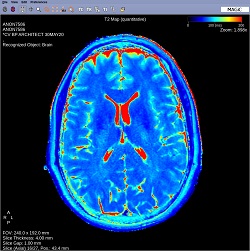
Click R1 Map and R1 is displayed in s-1, R1 = 1/T1. 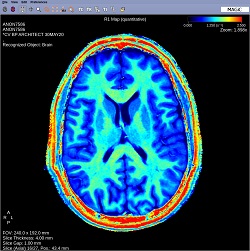
Click R2 Map and R2 is displayed in s-1, R2 = 1/T2. 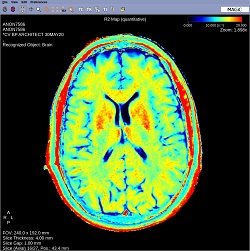
Click PD Map and the proton density is displayed in percentage units (pu) relative to a reference value of 100 pu. The reference value used depends on the detected object. For brains the ventricular CSF is used for calibration. Fat has higher signal strength than water and is therefore displayed with values above 100 pu. 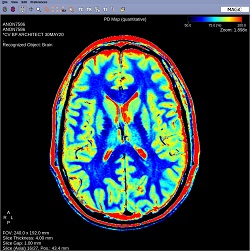
- To save the SyMaps®, place the cursor in the SyMaps®viewport you want to save and from the menu bar, click .
- The SyMaps®images are saved as black/white (non-color), which is different from how they are viewed in the MAGiC session application.
- The series is saved as a MULTI_QMAP series type.
Figure 2. Save SyMaps® (T1T2PD) to Browser patient list 
- To save an image as a screen shot, from the menu bar, click .
- The screenshot is saved as a SSAVE file type.
Figure 3. Save Screenshot to Browser patient list 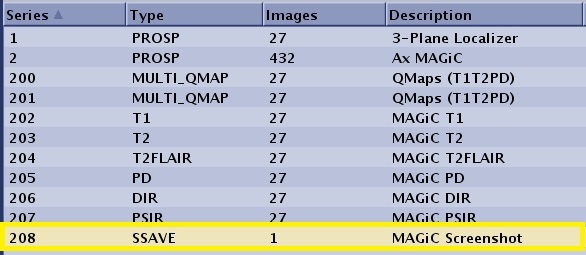
- The screenshot is saved as a SSAVE file type.
- To view the SyMaps® once you have exited MAGiC, follow these steps.
- From the patient list, click a SyMaps® series.
-
Note: SyMaps® is labeled as a QMAP in the patient list.
Figure 4. Select a SyMaps® series 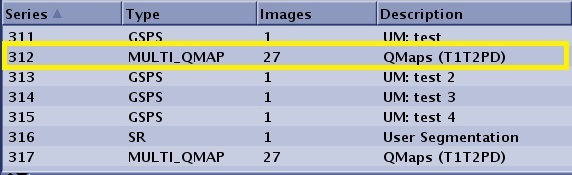
-
- From the Session Apps list, click MAGiC.
- From the patient list, click a SyMaps® series.