

- 00000018WIA300EE870GYZ
- id_400224841.4
- Aug 16, 2022 6:28:26 PM
Use TR Auto
About this task
- As the number of acquisitions increases, the TR decreases. The TR affects both scan time, SNR and image contrast. Be sure to consider the implications and tradeoffs that occur when the TR is lowered. The following table demonstrates the Auto TR selections for a T1-weighted protocol that has a TR = 400, prescribed slices = 10, and maximum number of slices per acquisition = 8 (this protocol would result in two acquisitions for a scan time of 50 seconds).
Table 1. Auto TR Auto TR # of Acqs Max # of slices/acq Scan time 500 (1 Acq) 1 10 32 sec 250 (2 Acqs) 2 5 32 sec 200 (3 Acqs) 3 4 38 sec - Both the 500 TR and 250 TR selections result in the same scan time and the same number of slices, but the 250 TR images will have significantly lower SNR than the 500 TR images. The 250 TR images will have more T1-weighted contrast than the 500 TR images, but again less SNR than the 500 TR images.
- If Locs Before Pause and Auto TR are selected and you increase the number of slices, the TR time increases as does the scan time. Be certain to review the scan time to make sure you are within the limits of the patient’s breath hold capabilities.
- For T1-weighted sequences:
- Each of the Auto TR selections results in approximately the same scan time. As the number of acquisitions increases the TR decreases. If you are acquiring a T1-weighted image with a SE or FSE PSD, the lower the TR the better the T1 image contrast. Therefore selecting the lower TR may be desirable. The tradeoff for acquiring the scan with a lower TR is reduced SNR (as TR decreases, SNR decreases).
- For example, if you are prescribing a T1 SE scan with 21 image locations, the TR menu may look like the following: 534 TR results in the shortest TR to acquire 21 locations and 284 TR results in the shortest TR to acquire 21 locations in 2 acquisitions. Both of these scans are approximately the same scan time. The 534 TR scan will have more SNR than the 284 TR scan.
- For T2-weighted sequences:
- Auto TR also works very well for T2-weighted scans. For example, if the TR is 3000 ms and the maximum number of Slices/Acq is 6 but your prescription is for 8 slices, the prescription results in two acquisitions. Selecting Auto TR in this situation places all 8 slices into one acquisition with an adjusted TR that has minimal effect on contrast.
- The result of using the Auto TR selection is reduced scan time since all slices are acquired within a single acquisition.
Use Auto TR to help you select the optimum TR for the desired image contrast.
Step-by-step instructions
- From the TR menu, select Auto.
- Once you select Auto, the screen parameter name changes to indicate that Auto is selected and the TR value is displayed in the text field.
Figure 1. TR menu 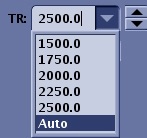

- If you change the number of slices after you have selected Auto TR, the TR changes, and the scan time changes slightly. Note that the number of acquisitions may change.
- Once you select Auto, the screen parameter name changes to indicate that Auto is selected and the TR value is displayed in the text field.
- From the Scan Parameter screen, click the
 and then click the Advance tab.