Before you begin
A scan session is open, a Silenz MRA protocol is selected and the Silent MRA series is in the INRX state.About this task
Use these steps to select an Auto IR Band option for Silenz MRA scan procedure scans and for Inhance 3D Inflow IR scans.Step-by-step instructions
- From the Scan Parameters Detail screen, select an option from the Auto IR Band menu: On or Off.
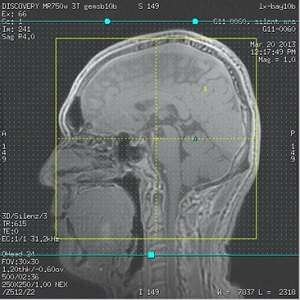
The IR Band is used to determine the position of the ASL tagging and control planes.
- Select On to automatically prescribe the IR (Inversion Recovery) band.
- Select Off to manually position the IR band and complete the following steps:
- From the Graphic Rx toolbar, click IR.
- From the IR menu, click IR A. Only one IR saturation band is allowed with Silenz MRA.
- Place the cursor on the localizer image and click to deposit the IR saturation band.
- The position of ASL tagging plane is determined by the inferior boundary of the IR band.
- The position of ASL control plane is determined by the superior boundary of the IR band.
- Adjust the IR band so that superior/inferior edges are outside the 3D slab.
Placement of the IR band edges is critical in order to avoid signal suppression in the final images.
Figure 1. Example of IR saturation band placement