Use these steps to define the master viewport layout, within which you can define a format for each master viewport. Each master viewport can be divided into smaller viewports based on the selection from the Format button.
Step-by-step instructions
Open the Viewer.
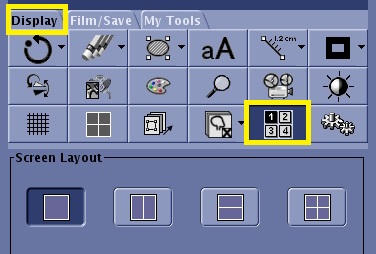
From the Display tab, click the Screen Layout icon.
Figure 1. Screen Layout icon and panel on the Display tab
From the Screen Layout panel, select one of the master screen layouts.
1-on-1
2-on-1 horizontal split
2-on-1 vertical split
4-on-1
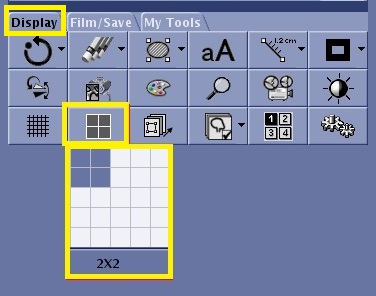
From the Display tab, click the Format icon and select the desired format.
This is the format of images that will be placed within the selected master viewport. Figure 2. Format icon and menu on the Display tab
Select the master viewport into which you want to place screen layout images.
This makes the viewport active.
From the Data Selector, select the desired series and click View.
Result
The images from the selected series are displayed with the selected format in the active viewport.
Repeat steps 4-6 for each master viewport, since each master viewport can have a unique series and format.
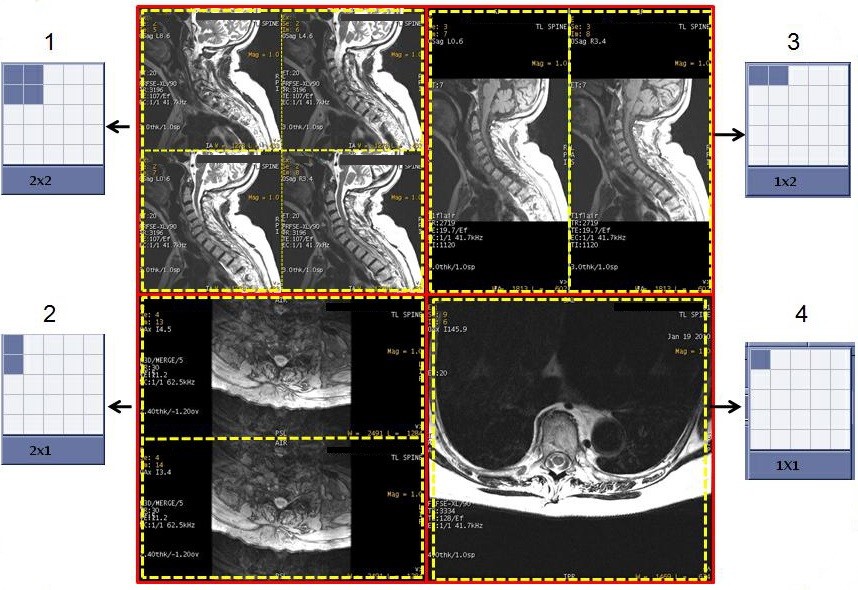
In the example below, a 4-on-1 screen layout is selected with a unique format for each master viewport.
Figure 3. Solid red line represents screen layout and dashed yellow lines represent format
Table 1. Image legend
Number
Description
1
Upper left viewport has a 4-on-1 format
2
Upper right viewport has a 2-on-1, side-by-side vertical format
3
Lower left viewport has a 2-on-1, top-by-bottom horizontal format
4
Lower right viewport has a 1-on-1 format
Use these steps to reset the viewports.
Select the Format icon and select a 1-on-1 format display.
Select the Screen Layout icon and select a 1-on-1 viewport display.