

- 00000018WIA302FEE80GYZ
- id_20374501.2
- Mar 28, 2022 12:14:50 PM
Save the image state
Before you begin
Each additional time an image state is saved for the same series, another object is placed in the GSPS series. The GSPS series is the source series number + 10,000. The GSPS series 10001 in the figure below has four images indicating that save state was used four times on the same series.
The following image render attributes get saved as part of the GSPS object:
- W/L values (per image frame)
- Pan (per image frame)
- Zoom (per image frame)
- Gse luts (per GSPS object, common for all frames)
- Inverse Video (per GSPS object, common for all frames)
- Image orientation flip and rotate (per GSPS object, common for all frames)
- ROIs (rectangle, ellipse, polygon, line and angle) (per image frame)
- User annotation (per image frame)
- Matte (per GSPS object, common for all frames)
The PROSP and the GSPS series can be networked and archived so that when displayed on a remote system, the saved image manipulation and images are displayed. They must both be sent to the end destination. If you only send the source images the image manipulation does not transfer since the image manipulation is located in the GSPS series.
The source and GSPS series can be archived and networked manually or automatically. If you want the GSPS series to be automatically archived or networked, you must turn on Auto Archive or Auto Transfer by Exam and then create the GSPS series prior to ending the exam. Any GSPS series acquired after you have ended the exam needs to be manually archived or networked.
About this task
Use the Save State tool to save the current window width and level, image manipulation (for example, magnification, flip/rotate, and scroll), and all images (for example, annotation, matte, and measurements) to a GSPS series in the Patient List.
Step-by-step instructions
- Open the Viewer.
- Use these steps to save state using the Command Line.
- Select the desired images to view.
- Display the images in the desired state.Place annotation text away from the edge of the viewport. If the edge of the text box abuts the edge of the viewport when the image is displayed on another viewer, for example your PACS viewer, it may not display.
- Place the cursor in the Command Line and type ss in the and press Enter to save the image state.
- Use these steps to save state from the Film/Save tab.
- From the Film/Save tab, click the Save State icon.
Figure 1. Save State icon and panel on the Film/Save tab 
- Enter text in the Presentation Label text field, if desired.
- Select a range of images.
- Click Save State.
- From the Film/Save tab, click the Save State icon.
- Use these steps to view the saved state image (GSPS).
- From the Patient List or Data Selector, select a GSPS series.
Figure 2. Data Selector example of a single GSPS series within an exam 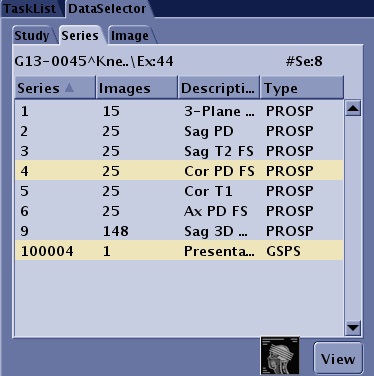
Figure 3. Patient List example of a single GSPS series within an exam 
Table 1. Image legend Number Description 1 GSPS series selected in Image Management patient list. 2 The selected GSPS series results in a GSPS information area to display where typically the image list is displayed. - From the Session Apps list, click Viewer.
- From the DataSelector, click View.
- From the Patient List or Data Selector, select a GSPS series.