

- 00000018WIA30EDD770GYZ
- id_400257401.5
- Mar 28, 2022 12:04:23 PM
Reference Image
Before you begin
- The reference image must be in another plane from the main image.
- The two images (the main image and the reference image) must be from the same examination and must have the same horizontal landmark, same patient position, and same patient entry.
- The viewport image and the Reference Image cannot be a Screen Save, a 3D Rendered Image, or a member of the Combined Images set.
- All Reference Image viewports display the same image. You cannot put unique images within separate or different viewports. If you change the image in one Reference Image viewport, all other Reference Image viewports are updated to the same image.
- Inverse Video affects both the main image and the Reference Image.
- Series Binding should not be applied to the Reference Image.
About this task
Use the Reference Image tool to show the image from which the primary image was prescribed in small viewport within the image.
Considerations
Step-by-step instructions
- From the Display tab, click the Reference Image icon arrow to view the menu. Note that the Reference Image menu changes based on the last icon selected.
Figure 1. Reference image icon and menu on the Display tab 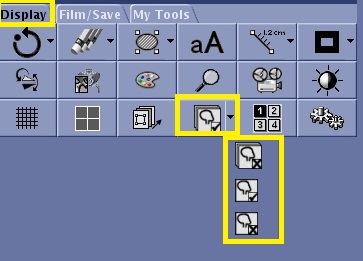
- Select an icon from the Reference Image menu. Hover the cursor over the icon to identify the cursor's action.
- Click the Off icon (
 ) to turn the reference image off all viewports or the selected viewport.
 - Click the On icon (
 ) to turn on the reference image on the Primary viewport or all viewports.
- Click the Off icon (