

- 00000018WIA30AC7870GYZ
- id_400235871.6
- Jul 20, 2022 1:54:27 PM
Scan with AutoBind
Before you begin
- A scan session is open.
- Localizers and other series have been acquired.
- For scan details, see Scan with a protocol.
About this task
The procedure below uses a whole body protocol as an example.
Step-by-step instructions
- From the Protocol screen, select a protocol for AutoBind. AutoBind requirements include the following:
- It is only compatible with: 2D Mode, Echo Planar Imaging family, DW EPI pulse.
Figure 1. Example of a typical AutoBind protocol 
- It is only compatible with: 2D Mode, Echo Planar Imaging family, DW EPI pulse.
- Click the
 to send the protocol to the Multi Protocol Basket.
 - From the AutoBind screen, complete all fields and selections.
Figure 2. AutoBind screen 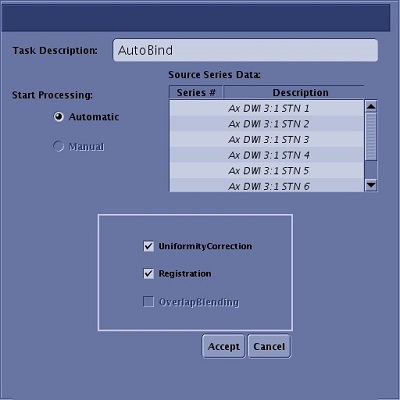
- From the AutoBind Source Series Data list, select the DWI series that you want to bind.
- In the Task Description text box, type and enter an AutoBind series description.
- Select Uniformity Correction option to improve visualization of bound data, which provides similar window width and window level from head to feet. It requires a minimum of a 4-slice overlap between stations.
- Select Registration option to optimize continuity and alignment of anatomy from head to feet for DWI acquisitions acquired with same pixel size. It requires a minimum of a 4-slice overlap between stations. It is only available with axial DWI scans.
- Select OverlapBlending option to improve intensity transitions at the overlap region and therefore across the whole body. It requires a minimum of a 4-slice overlap between stations. A perfect match between overlap slices improves the algorithm results.
- If no corrections are selected, the axial images are simply stacked
- Click Accept.
Result
The AutoBind screen closes. Auto displays as the status of the post-process task in the Workflow Manager.Figure 3. Workflow Manager with Auto task 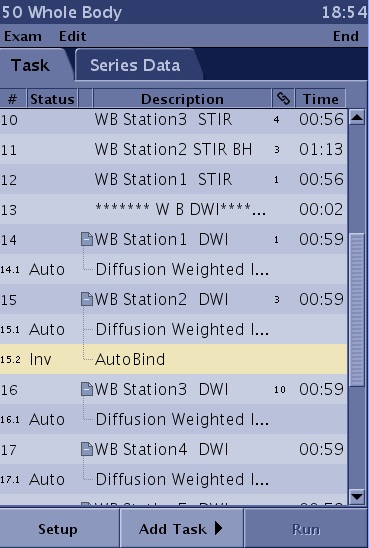
- Graphically prescribe the scan locations for each series that meet the following requirements:
- Scan plane must be axial.
- The series should have a contiguous range with no gaps from one series to the next.
- Optional: once the first series scan parameters are defined, use the Graphic Rx toolbar
 feature to ensure that the same scan parameters are used for each series you want to bind. For details, see Copy/Paste procedures.
 Figure 4. The invalid state is only confirmed after the series have been saved in RXd state 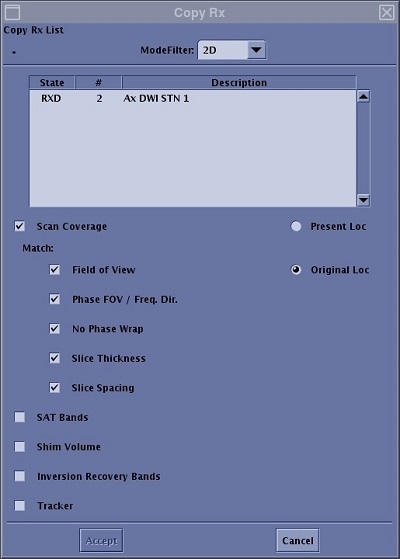
- If the AutoBind task displays an INV (invalid) state and a message displays that the AutoBind requirements are not met, then the series will not bind. The invalid state is only confirmed after the series have been acquired, thus it is very important that all series meet the AutoBind requirements.