A multi-slice, axial calibration scan is used to measure the receive coil sensitivities. It is required prior to an ASSET, HyperBand, or PURE image acquisition.
Calibration scan is required for images acquired with ASSET to account for the phase wrapped or aliased anatomy that occurs within each coil in the phased array set. The receive coil sensitivity maps are needed to unwrap the aliasing in the ASSET scan.
Calibration scan is used for PURE images to create reference maps. Two reference images are acquired for every scan location so that if a PURE scan is acquired there is a body reference image and a surface coil reference image in the calibration file.
If more than one calibration is done, the data is used from the most recent calibration scan.
Calibration images are saved as a separate series and can be recalled from the Patient List.
If another examination is performed on the same patient, another calibration scan must be performed.
Warning
If the calibration scan covers a region containing MR Conditional metal implants, the calibration images are expected to have distortion and signal void artifacts. Therefore, PURE and ASSET images that have MR Conditional metal present should not be used for post processing.
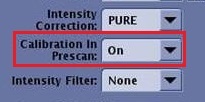
The calibration scan procedure is automatically acquired as part of Auto Prescan if the Calibration in Prescan option is set to On from the Details tab. If the Calibration in Prescan option is set to Off, then follow these instructions.
Step-by-step instructions
From the Workflow Manager, select the scanned calibration series, right-click and from the Edit menu select Duplicate & Setup.
From the Details tab, Calibration in Prescan menu, select Off.
Note: The slices must be prescribed before you can see the Off selection in the Calibration in Prescan menu.
Figure 1. Calibration in Prescan menu
Continue with the scan prescription and click Save Rx.
Result
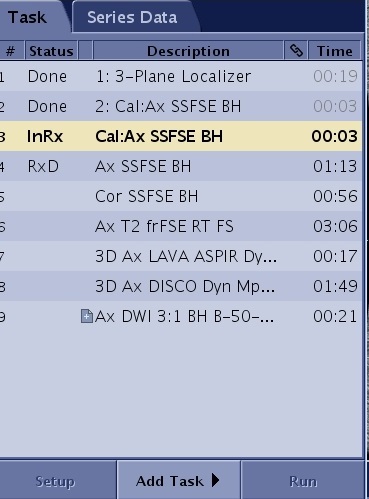
A calibration series is automatically added to the Workflow Manager and scanned. Figure 2. Calibration series added to Workflow Manager
From the Workflow Manager, select the scanned calibration series, right-click and from the Edit menu select Duplicate & Setup.
Adjust the scan parameters, as needed.
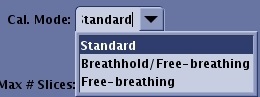
From the Scan Parameters tab, select an option from the Calibration Mode menu.
Figure 3. Calibration Mode menu
Standard is typically selected for anatomic regions not susceptible to motion artifacts (for example, brain scans, musculoskeletal). This mode can also be used with patients you are certain will have no variation in their breath hold technique from one acquisition to the next. This is the shortest calibration scan time.
Breathhold/Free-breathing is typically selected for anatomic regions (chest and abdomen) susceptible to breathing motion artifact. Give breath hold instructions with this mode. This mode is typically used when you are not certain the patient can hold their breath at the same inspiration or expiration point from one acquisition to the next. The first part of the calibration scan is executed with a breath hold. The system then pauses and starts a second calibration data collection that is acquired during free breathing by the patient. The two sets of data provide a more robust calibration scan that compensates for some patient breath hold variation.
Free-breathing is typically selected for anatomic regions (chest and abdomen) susceptible to breathing motion artifact and for patients who are unable to hold their breath.
The default FOV is set according to the coil configuration.
The default slice thickness for a 3D calibration scan is a value that results in isotropic resolution. Typically do not change the slice thickness.
The maximum number of scan locations is 64.
Place the Graphic Rx slab over the area of interest. Click and drag the 3D box from the borders of the box or the intersecting lines inside the box.
If clinical scans are acquired outside of the calibration volume, that portion of the image is cut-off.
The information obtained during the calibration scan is stored and used throughout the patient’s examination. Therefore, the calibration scan should cover anatomy to be scanned for all other series in the exam. You only need to perform the calibration scan once for your entire examination. However, you may acquire more, if the scanning ranges change considerably throughout your examination.
Scan the acquisition. Consider the following tips for manual calibration.
For breath hold calibration scans, click Save Rx > Prep Scan, give the patient breathing instructions, and then click Scan. Consider using Auto Voice for the breathing instructions.
For non-breath hold calibration scans, click Save Rx > Scan.
After the series downloads, the table automatically moves to the new scan location if it is within 5 cm from the current table location.
Repeat the calibration scan for each series if the landmark has changed.
The 3D calibration scan is annotated as: 3D/FSPGR/1, where 1 is the flip angle.
Note: If you decide a new coil calibration is needed, one method to acquire it is to click Run Calibration from the manual prescan screen. Another option is to acquire an additional Auto Prescan at a new slice location, since Auto Prescan acquires a new coil calibration if warranted.