

- 00000018WIA30F1A870GYZ
- id_400253041.3
- Apr 20, 2022 9:44:07 PM
Add an image
About this task
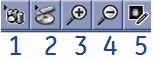
| Number | Description |
|---|---|
| 1 | Image capture |
| 2 | Opens user interface to insert an image from a USB device or CD |
| 3 | Magnifies the image in the Protocol Note |
| 4 | Minifies the image in the Protocol Note |
| 5 | Opens a Picture Viewer that allows you to paint over areas of the image. For example, paint over patient information |
Use these steps to add an image related to the series that is currently in a setup state (INRX).
Step-by-step instructions
- From the Protocol Notes menu bar, click the
 to open the image capture tool.
Figure 2. Image capture tool 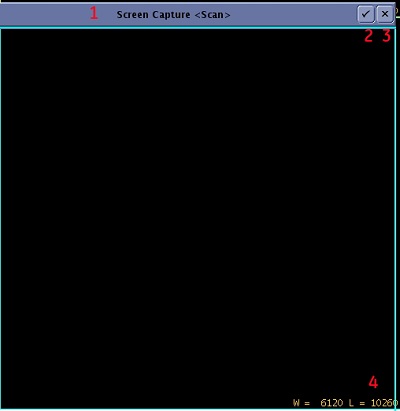
Table 2. Image legend Number Description 1 Title bar 2 Image capture icon 3 Close icon 4 Size tool