Use these steps to acquire both water and fat suppressed liver or pelvic images in a single slab acquisition. If no out-put series are defined for the sequence, fat suppressed images are reconstructed as the default series.
Step-by-step instructions
Position the patient with the hands raised above the patient's head. This position avoids fringe field artifacts and some water/fat swap.
From the Protocol screen, select a LAVA with Flex protocol from your site or GE library.
At a minimum, include a localizer and a LAVA with Flex series.
LAVA with Flex uses a self-calibrated technique (ARC) to expedite the exam - it does not require a calibration scan.
If you cannot locate a LAVA with Flex protocol in either library, then from the Protocol screen complete the following:
From the GE protocol library, click the Template tab.
Click the 3D Gradient Echo folder.
From the PSD list, click LAVA and add it to the Multi-Protocol Basket.
Click Accept.
Acquire a 3-plane localizer.
From the Workflow Manager, select the LAVA series and click Setup
From the Scan control panel, click Imaging Options.
From the Imaging Options screen, click Flex and any other desired options.
Scan parameter and Detail tab considerations.
A high bandwidth is used to minimize chemical shift effects.
Consider using multi-NEX for improved SNR on high resolution scans.
Due to chemical shift challenges, use the following recommended TE values. These TE limits will limit the maximum resolution (frequency encodings) you can choose:
1.5T: have the out-of-phase TE range within 2.0 to 2.5 ms and the in-phase TE range within 4.0 to 5.3 ms.
If any or all of these scan parameters are selected (ASSET, HyperBand, PURE), and if you select On from the Calibration in Prescan menu, which is located on the Details tab, a calibration scan is acquired during Auto Prescan.
Click the Dixon tab. Figure 1. LAVA with FLEX: Dixon tab
Select the Dixon images you want reconstructed: in-phase or out-of-phase.
All Flex prescriptions have Fat and Water automatically selected and therefore they cannot be de-selected.
Click the Acceleration tab.
Choose acceleration factors along the phase and/or slice-encoding direction. Default acceleration is along the phase encoding direction. If number of slices is less than 32, slice-acceleration is not recommended
Click the Advanced tab and select User CV values, if needed.
Image Acquisition Delay: Make adjustments as needed. Enter an Image Acquisition Delay for a pause time before the start of an acquisition that uses Fluoro Trigger.
K-Space: Select a viewing order option: Elliptical Centric or Centric.
Multiple TR Acquisitions 1 = On, 0 = Off. When turned on with smaller FOVs, it keeps in-phase and out-of-phase TE values within an acceptable range. The scan time increases, so it is most suitable for non-breath hold acquisitions.
NEX Mode: It is only available when a NEX value greater than 1 is selected.
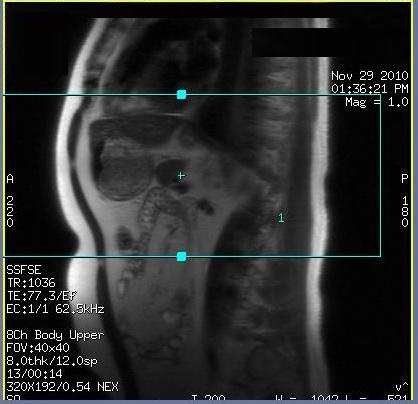
Prescribe the graphic locations. Deposit and position a single slab.
Figure 2. Example of a single slab LAVA-Flex graphic prescription
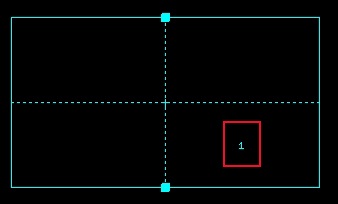
To change the slice order, for example from superior to inferior, place the cursor on the square solid box and click and drag it in the opposite direction. Figure 3. Change 3D slab slice order from superior to inferiorFigure 4. Note the location change of the image number.
A maximum of 2048 images can be prescribed with a LAVA-Flex acquisition.
LAVA with Flex is not compatible with any Chem SAT pulses.
When the prescription is finished, click Save Rx and Scan.
It is normal for a pause to occur between the end of the acquisition and the display of images in AutoView. The pause occurs due to the unique parallel imaging reconstruction method used, which results in all images displayed in AutoView in one burst, as opposed to one image at a time.