

- 00000018WIA30977870GYZ
- id_400232651.2
- Feb 11, 2022 11:55:30 AM
HIS/RIS: Map a protocol to HIS/RIS code
About this task
Step-by-step instructions
- From the left panel, click Auto Mapping Configure.
Figure 1. Auto Mapping Configure screen 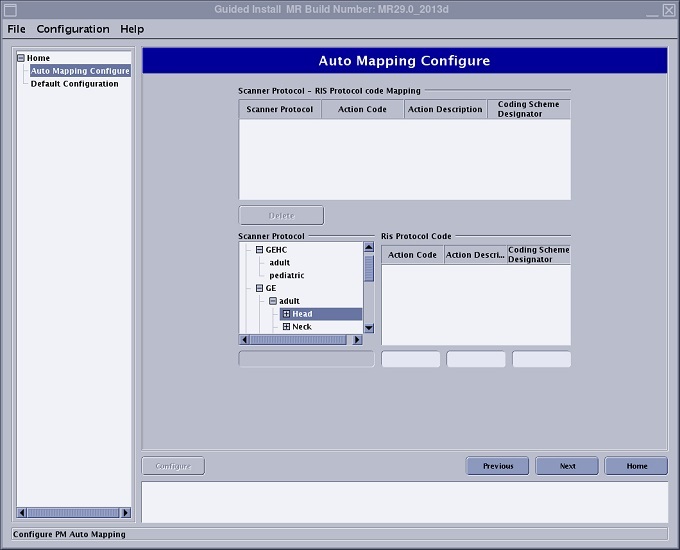
- From the Scanner Protocol area, navigate to the protocol location in which you want the auto map associated.
Figure 2. Scanner Protocol area 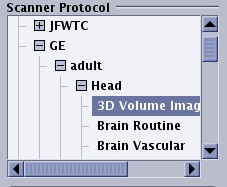
- From the Scanner Protocol - RIS Protocol code Mapping area, enter the Action Code and Coding Scheme Designator for the selected scanner protocol.
Figure 3. RIS Protocol code Mapping area 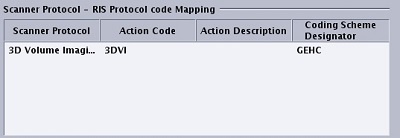
- Click Configure.
- Each time a worklist item comes in with the same Action Code and Coding Scheme Designator, the exam is launched with the protocol selected form the Auto Mapping Configure screen.
Figure 4. RIS Protocol Code area 
- Each time a worklist item comes in with the same Action Code and Coding Scheme Designator, the exam is launched with the protocol selected form the Auto Mapping Configure screen.