About this task
Use these steps to activate the auto start feature.Step-by-step instructions
- Open Guided Install.
- From the list of applications, click GI: FE mode.
- Click Start.
- Place the cursor in the Install window and click to activate.
- At the root password prompt, type your password and press Enter to display the Guided Install screen.
If you do not know the password, consult your site administrator.
- To activate Enable Auto-start, follow these steps.
Figure 1. HIPAA/Security screen Enable Auto-start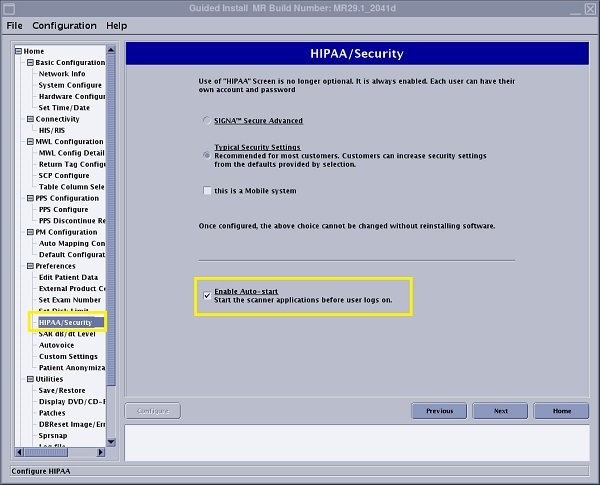
- From the Preferences menu, click HIPAA/Security.
- From the HIPAA/Security screen, click the Enable Auto-start option.
Auto-start enables the scanner applications to automatically begin before a user logs on. A message displays with a 30 second count-down at logon.
- Click Configure to accept your configuration changes.
- To close the Guided Install screen, click .
- In the Message box, click Yes to confirm the quit action.
- From the Tools menu, click System Restart to reboot the computer.

