When ADC launches, the source, image maps and a 3D view display. The image/graph displayed in each viewport is based on the selected protocol. The system automatically sets the threshold and b-value.
Use these steps in the case of a processing session that has a maximum of 2 DWI series loaded. A new set of review steps are added and have ADC2 included in their label.
Load the first DWI series, which is processed under ADC.
The ADC related review steps and ADC related map names display ADC.
Load the second DWI series, which is processed under ADC2.
The ADC related review steps and ADC related map names display ADC2.
Select the desired review step that has the desired DWI series and apply any settings, such as noise threshold, EPI-correction, confidence level, etc.
Note: The processed volume in the Save Functional Volume menu displays the same name as is in the viewports. For details, see Save functional maps.
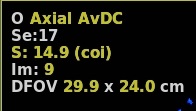
Select the desired scan plane and map from the scan plane and map yellow annotation menus.
Figure 1. Scan plane and functional map active annotation
When DWI launches, the default protocol has a particular scan plane and a map(s) displayed in the three map viewports. You may prefer to have a different scan plane and map in each viewport. For details, see Change the image/map in a viewport.
Adjust W/L and mag factor. Put the cursor in the desired viewport.