This procedure assumes that you have composed a report in Data Export. If not, first complete the steps in Data Export: Compose report.
Step-by-step instructions
From the header area of the screen, click the to open the Image Management work area.
From the Patient List area, select the series you want to export. Only one series can be exported at a time.
From the Data Apps List, click Data Export.
Figure 1. Data Apps list
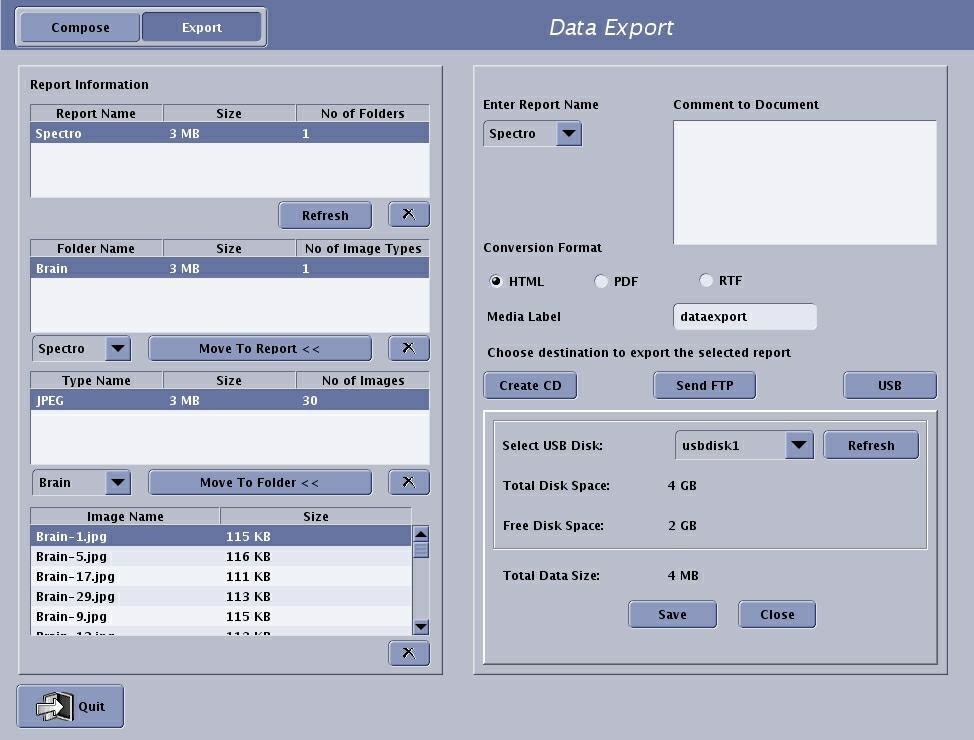
Click the Export tab to open the Data Export screen.
Figure 2. Export tab
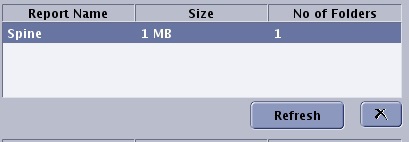
From the Export Report Name list, select the desired report.
Figure 3. Report Name area
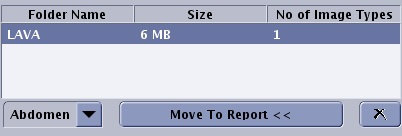
From the Folder Name list, select the desired data set.
The Folder Name list identifies all the folders associated with the report name. Check the file size to make sure you can FTP the file or store it on a single CD-R. Figure 4. Report name area
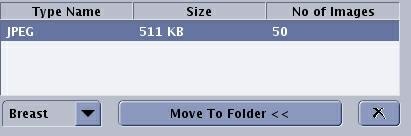
From the Type Name list, make a selection.
The Type Name list contains all of the file types within the selected folder. Keep in mind that the only items displayed in the list are the item types. If, for example, you added 20 T1 JPEG images to Folder 1 and then added another 20 T2 JPEG images to Folder 1, the number of JPEGs in folder 1 is 40. The quantity and size of each data type is listed. Figure 5. Type Name area
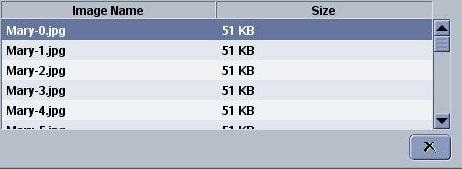
From the Image Name list, make a selection.
The Image Name list contains all of the images within the selected file type. Figure 6. Image Name area
From the Folder Name or Type Name lists, click Move to Report to move the selected item to a destination of your choice.
For example, you can select an item in the Type list and add it to a particular folder in the Folder list. The size of the data that comprises each folder is listed.
To remove an item from any of the lists, select an item and click the .
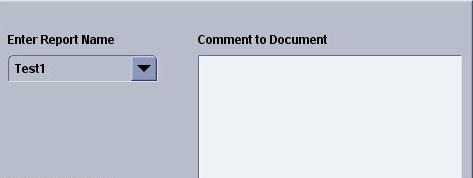
Optional: Type a message in the Comment text box. Do not press Enter, the system will adjust the text for the final report.
Figure 7. Enter report name area
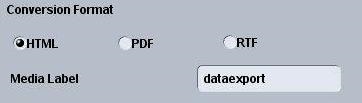
Choose a conversion format, typically html.
Figure 8. Conversion formats area
Select a media type for the export.
Figure 9. Media type area
To create a CD or DVD, follow these steps.
Place a compatible DVD R+W, CD R+W in the system CD/DVD drive.
From the media type area, click Create CD.
Click OK to start the writing process.
A message displays while the CD/DVD is written. When the CD/DVD writing step is completed, the CD/DVD ejects from the drive.
Click OK to the CD Written Successful prompt.
To FTP the data, follow these steps.
From the media type area, click Send FTP to send the data to an IP address.
Complete all the fields on the FTP window and click OK.
Click OK to the Successful File transfer prompt.
To store the data on a USB device, follow these steps.
Insert a device such as a memory stick into one of the USB ports located in the front of the computer.
Click USB.
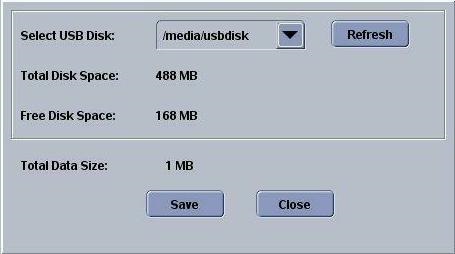
If more than one device is inserted into the USB ports, then select from the USB media information area, the device to which you want to send the report from the Select USB Disk menu.
Figure 10. Media information area
Verify that you have enough space on your device by viewing the Total Disk Space and Free Disk Space display on the Export window. The Total Data Size of the report is displayed right below the Free Disk Space.
Click Save to start the save process. Do not remove the device from the USB port until you see a message prompt indicating that the device can be disconnected safely.
Click Close to close this area of the Data Export window.
Remove the device from your USB port.
Plug the device into a USB port on a laptop or PC.
Open the device and view the contents of the device.
The report and images are located in a folder on your device.
The folder name is the name you labeled the report from the Data Export screen.
Click Quit.
Reports stay listed in the Export tab until you remove them.
Consider the length of time you need to keep the file in the program based on if you need to, more than once, burn another CD/DVD, send it to a USB device, or FTP the report.


 to open the Image Management work area.
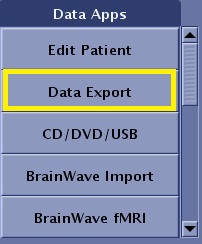
 .
.