

- 00000018WIA30F4F870GYZ
- id_400226151.4
- May 16, 2022 12:11:44 AM
ClariView
About this task
Use these steps to add, preview, edit or remove a custom Intensity Filter as a post-process task. The custom Intensity Filter allows 5 Noise Reduction and 5 Sharpening characteristics that can be individually adjusted and saved for later retrieval. The saved custom filters are applied every time the filter is selected from ClariView.
Note: Inappropriate filter levels may produce unexpected image results.
Considerations
-
Note: The custom filter is added to the Intensity Filter menu located on the scan Details tab. The custom filter has a U prefix.
Figure 1. Filter Intensity menu 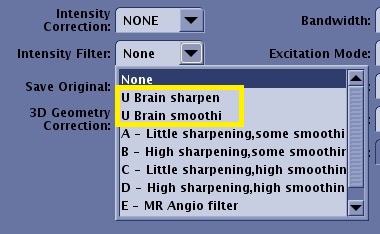
- Custom filtered image annotation.
Figure 2. The image annotation includes the following labels: 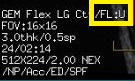
- The series text page displays the filter information. It varies based on the applied filters and scan parameters.
Figure 3. Example of the filter annotation on the series text page. 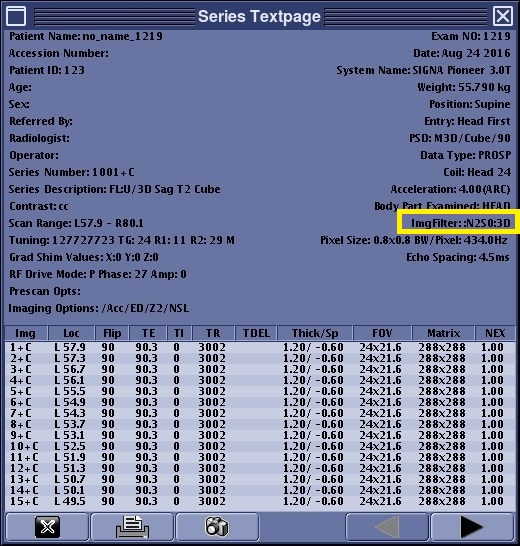
Step-by-step instructions
- From the header area of the screen, click the
 to open the Image Management work area.
 - From the Session Apps list, click ClariView to open the ClariView screen.
Figure 4. ClariView screen 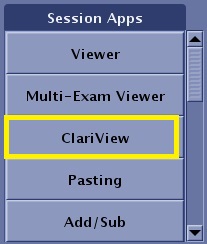
Figure 5. ClariView screen 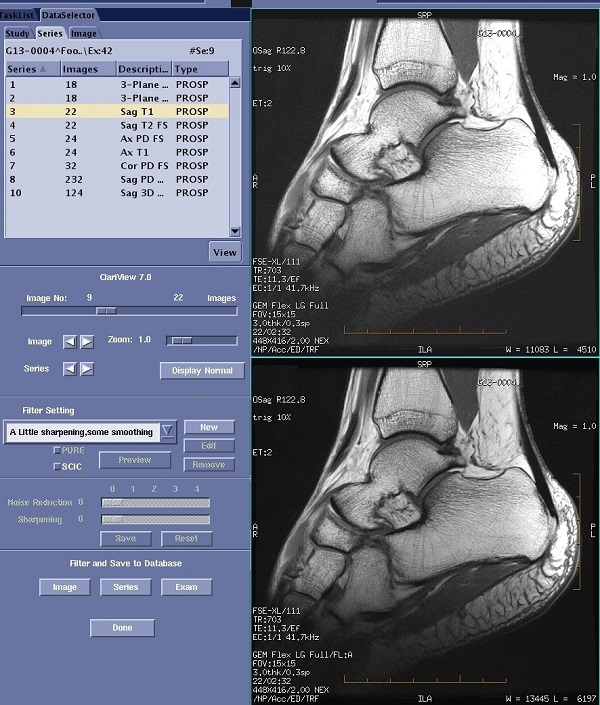
- The top viewport initially displays the image selected from the patient list. It is an unfiltered image. To view a different image, make sure the viewport is active and then use the Image slider or the Series and Image arrows to view a different image in the viewport.
- The bottom viewport displays the filtered image once you click Preview. To view a different image, make sure the viewport is active and then use the Image slider or the Series and Image arrows to view a different image in the viewport.
- Move the Zoom slider to select a magnification factor to be applied to the images.
- To add a filter, follow these steps.
Figure 6. Filter Settings screen area 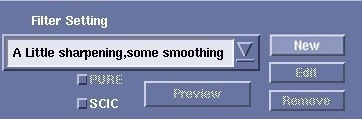
- From the ClariView screen, Filter Setting area click New.
- In the text field, type the custom filter name.
- A maximum of 48 characters are allowed.
- The name must be unique.
- The name field must be completed - a blank name is not allowed.
- Do not use a description that includes symbols (/?*:|"<>...).
- A maximum of 1000 filters is allowed.
- Adjust the Noise Reduction (smoothing effect) slider to the desired value.
- Adjust the Sharpening (edge enhancement) slider to the desired value.
- Click Preview to view the changed image.
- Click Save to save the filter changes and add the filter to the list of ClariView filters.
- To apply the selected filter to an entire image, series, or exam and to save the new, filtered images, make a selection in the Filter and Save to Database area.
Figure 7. Filter and Save to Database screen area 
- The system counts the number of images or series completed during the filtering process. This count is shown in the area above the Done button.