To work with protocols, you must belong to the ProtocolEdit group. If you are not assigned to the ProtocolEdit group a message appears when you try to work on a protocol.Figure 1. ProtocolEdit messageFigure 2. ProtocolEdit message
Click OK to the message and consult with your site administrator, who assigns roles for each MR user.
About this task
Use these steps to create or edit a protocol. All new protocols are created by editing an existing protocol.
Step-by-step instructions
Start a protocol session.
From the System Management Protocol screen, select a protocol you want to modify or use as a basis for a new protocol.
Click the anatomical tab and filters to refine the protocol list.
Click the Template tab to display a list of mode/PSD family, applications, and calibration protocols. Most of the scan parameter fields are blank in Template protocols. Template tab is typically used to create a protocol when you want to enter each scan parameter.
From the footer area of the Protocol screen, do one of the following:
Click Edit Protocol to edit the selected protocol and open the Edit Protocol session.
Click Duplicate to duplicate and create a new protocol. If you select Duplicate, from the Properties screen, change the protocol name, filters, and other protocol properties. Click Save.
Only one protocol session can be opened at a time.
From the Protocol Edit session, select the series in the Workflow Manager you want to edit and click Setup.
Change any of the scan parameters.
Add protocol notes as needed.
From the Workflow Manager, click the Series Data tab and select/deselect series to be automatically transferred during the scan, as desired.
Note: The checkboxes are always shown regardless of the auto transfer setting. You can change the state of the check box during the scan session.
Click Save Rx to save the modified scan parameters and the protocol notes to the series.
Note: The protocol name cannot include any of the following characters: \, ^, =.
Repeat steps 4 to 8 for each series in the Workflow Manager.
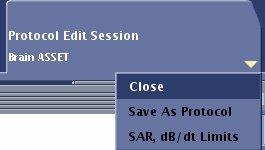
Click the Protocol Edit Session tab arrow and from the menu click SAR, dB/dt Limits.
Figure 3. Protocol Edit session tab menu
From the Protocol dB/dt and SAR Limits screen, complete the following:
Click the desired operating modes.
Click Accept to close the screen.
Click Exam > Save as Protocol.
Alternatively, click the Protocol Edit Session tab arrow and from the menu click Save as Protocol.
Respond to any confirmation prompts.
If you don't want to save the protocol, from the Workflow Manager menu or the Protocol Session tab, click End > Close to close the Protocol Edit session without saving the protocol.