

- 00000018WIA3019B770GYZ
- id_400233331.6
- Aug 13, 2022 2:51:46 PM
SAR and dB/dt
The SAR and dB/dt screen appears when you start a new exam.
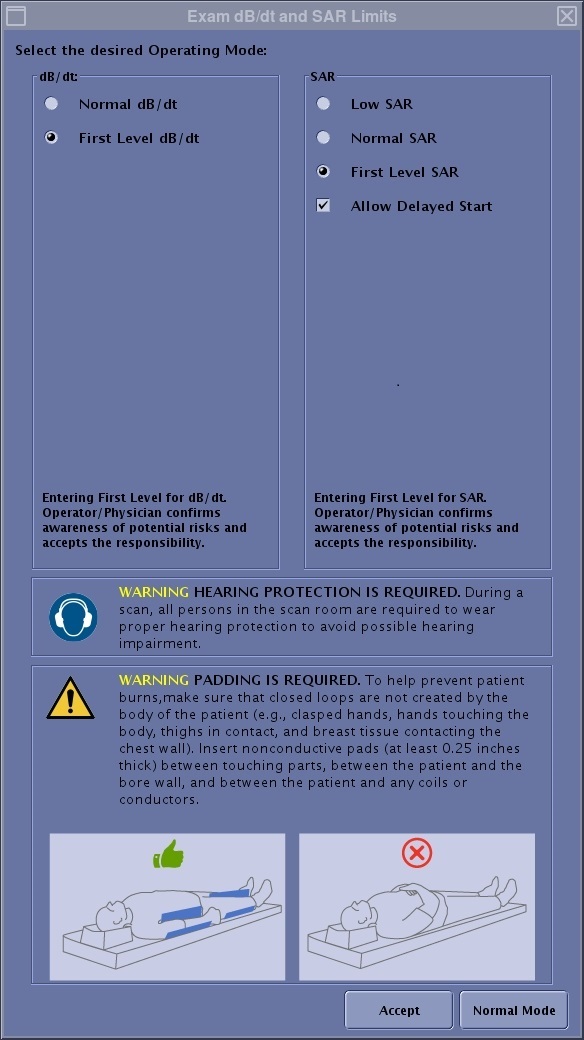
The Exam dB/dt and SAR limits screen allows you to set the operating mode for your scans.
The levels displayed in the dB/dt and SAR menus, are the levels for the prescribed scan. If a head transmit coil is in use, the estimated average head SAR (Head-SAR) is displayed along with the estimated whole-body SAR (WB-SAR) value. If an extremity transmit coil is in use, the estimated average partial-body SAR (PB-SAR) is displayed along with the estimated whole-body SAR (WB-SAR) value.
| Parameter | Description |
|---|---|
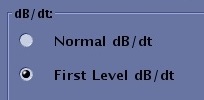
| dB/dt menu
| DB/dt controls gradient slew rate, which refers to the rate of change in magnetic field to time. It affects peripheral nerve stimulation. The dB/dt is expressed in T/s (Tesla/seconds). |
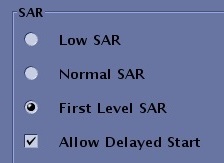
| SAR menu
| SAR refers to the RF power absorbed per unit of mass of an object (Watts/kg), which in turn can lead to heating. Therefore SAR affects the Specific Absorption Rate or heat deposition. SAR levels for the patient are based on current scientific literature related to safety. The level of exposure shall be a medical judgment as to the patient’s potential risk versus benefit. Allow Delayed Start enables/disables the Scan Sequence Time Optimization feature. When enabled, it can decrease overall exam time by allowing a delay before some scans. This allows the system to take full advantage of the 6 minute average for SAR. |
dB/dt and SAR modes/levels
| |
| Hearing Protection
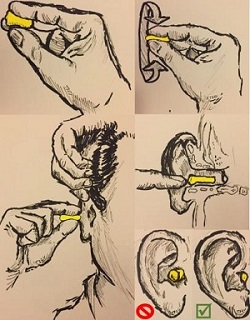 | Hearing protection is required. Carefully read the hearing protection text on the Exam dB/dt and SAR Limits screen.
During a scan, all persons in the scan room are required to wear proper hearing protection to avoid possible hearing impariment. Acoustic levels may exceed 99dBA. Properly worn hearing protection is required for all people in the magnet room during a scan, including any MR workers. Below are several topics regarding hearing protection. |
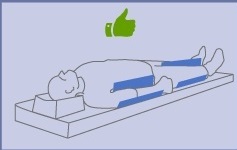
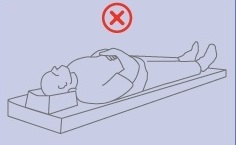
| Padding Protection
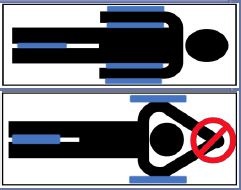 | Padding is required. Carefully read the hearing protection text on the Exam dB/dt and SAR Limits screen.
To help prevent patient burns, make sure that closed loops are not created by the body of the patient (e.g., clasped hands, hands touching the body, thighs in contact, and breast tissue contacting the chest wall). Insert nonconductive pads (at least 0.25 inches/0.64 cm thick) between touching parts, between the patient and the bore wall, and between the patient and any coils or conductors. Below are several topics regarding patient padding.
|
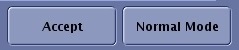
| Accept and Normal Mode
| Accept registers the changes and closes the screen.
Normal Mode applies Normal dB/dt and SAR modes. |


SAR and dB/dt considerations
The Exam dB/dt and SAR limits screen appears once you click Start Exam from the footer area of the Worklist Manager. The selections made from the screen are applied to all series with the scan session.
The dB/dt and SAR levels on the bottom of the Scan Parameter screen.
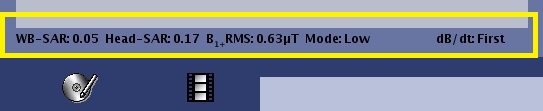
The values of the currently prescribed scan include the following:
- WB-SAR: Whole Body SAR (always shown)
- Head-SAR: Head SAR (shown with head or neck coil modes)
- PB-SAR: Partial Body SAR (shown with extremity transmit/receive coils)
- B1+ RMS: the estimated peak B1 RMS for currently prescribed scan.
- B1+RMS is the root mean square of the RF magnetic field (B1) of a pulse sequence averaged over a pulse repetition period (TR) . You can choose to view the B1rms of a pulse sequence on the control panel as a supplemental metric to SAR. For example, B1rms might be included in the labeling for MR Conditional implants.
- B1+RMS is estimated from the tip angle at the RF transmit coil center for the B1 component that precesses with the nucleus of interest (for example, protons). The estimate assumes the proper tip angle is set and that the RF magnetic field is in circular polarization.
- Mode: The mode of operation for SAR control: Low, Normal or First (always shown).
- dB/dt: the dB/dt and SAR levels for the series currently prescribed scan.
Good clinical practices
As is the case for all MR imaging, follow these good clinical practices:
- Continuous patient observation and contact are required. All patients should be monitored for increased temperature during the scan acquisition. If the patient reports discomfort due to excessive warming, stop the scan.
- Extra attention should be employed when scanning patients who are unconscious, sedated, or may have loss of feeling in any body part (temporary or permanent paralysis). They may not be able to alert you to RF heating.
- Give patient breaks to cool down, provide light clothing, limit room temperature to 18 ± 3 °C, and maximize air flow.
- During a exam scanning session, consider interleaving scans/sequences that are prone to high SAR (e.g. Spin Echo) and low SAR sequences (e.g. Gradient Echo) to minimize the effects of SAR related issues.
General considerations
Consider the following with SAR and the First Operating Mode:
- For more information about your MR system, see About MR Scanner.
- An override of 14.4 kj/kg is allowed in low SAR and normal operating modes; however in first control mode and second control mode no override will be allowed.
- When the exams starts, you are prompted to select a control mode. In normal mode, the system is limited to 2W/kg average whole body SAR. In first mode, SAR is limited to 3W/kg.
- A First Controlled Operating Mode message appears when the exam ends, the system resets to the normal clinical mode. When creating protocols, the system treats SAR levels the same as real-time prescriptions. If you want to always stay under 2W/kg, create your protocol by clicking Normal Mode when the warning message appears. If you click Accept, the system calculates the scan parameters based on the first controlled operating mode limits.
- On SIGNATM Voyager, power monitor trips become more likely if the temperature in the scan room exceeds 22.3 degrees Celsius (72.14 degrees Fahrenheit), due to changes in the power monitor limitation as the temperature increases. If the power monitor trips and the six minute average is 3.5 W/kg or less, adjust the scan room temperature to be 22.3 degrees C or less (for patient comfort the temperature should be 18 +/- 3 degrees).
- To reduce the possibility of a power monitor trip due to high SAR values, interleave high SAR series such as FSE, FLAIR, and SSFSE with lower SAR series such as GRE and EPI. This is particularly helpful when the Allow Delayed Start option is selected. Interleaving high and low SAR sequences will minimize the overall exam time.
- The Allow Delayed Start option enables/disables the Scan Sequence Time Optimization feature. When enabled, it can decrease overall exam time by allowing a delay before some scans. This allows the system to take full advantage of the 6 minute average for SAR.
- During the scan acquisition (not prescan), monitor the 10 sec SAR display. If the 10 sec SAR is exceeding the 6 minute SAR limit and Allowed Delayed Start option is not enabled from the SAR and dB/dt Limits screen, stop the scan and if possible, re-prescribe the protocol with fewer slices or increase the TR. When the Allow Delayed Start option is enabled, it is normal for the 10 second head SAR meter to occasionally exceed the 6 minute SAR limit. For more details, see Monitor SAR during an exam procedure.
- If you do not want to change the TR or the number of slices, then the following work-flow is recommended:
- Do NOT use auto-scan.
- Manually start each series when the 6-min average on the SAR display reads < 0.5 W.