

- 00000018WIA30F2E770GYZ
- id_400214821.3
- Mar 25, 2022 4:06:50 PM
Film procedures
The following steps are detailed in this topic:
- Open/Hide the film composer
- F1: Film a single film frame
- Drag and drop image to film frame
- F2: Film page
- F3: Film multiple images
- Film series
- Film Text page
- Delete image from a frame
- Film status
- Use these steps to show (open) or hide the Film Composer.
- From any Session tab (with the exception of Protocol session), click SHOW Filmer from the drop down menu.
Figure 1. Session tab 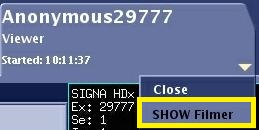
- The Film Composer can be opened and closed from multiple applications or sessions. Each application, in a sense, owns its own film composer, which allows you to have multiple filming sessions active at the same time. For example, you can have READY View open and from the Session tab, click SHOW Filmer to open a film composer from which you can begin filming. While the READY View session is open, you can open another review session, for example, Viewer and from the Viewer session tab, click SHOW Filmer to open a film composer from which you can begin filming. You now have two review sessions open and two separate film composers open.
- Each film composer is locked into the review session tab area to prevent confusion or mix-up of which film composer is assigned to which review session. For this reason, the Film Composer cannot be dragged off the session tab work area.
- Alternatively, from the Viewer Film /Save tab, click the
 .
. - From any Session tab, click HIDE Filmer to close the Film Composer.
- SHOW Filmer/HIDE Filmer is a toggle button.
- The images in the frames remain on the Film Composer when you hide it.
- From any Session tab (with the exception of Protocol session), click SHOW Filmer from the drop down menu.
- Use these steps to film a single image to a single film frame in the film composer.
- Place the cursor over the image you want to film.
- To place the currently active image in the next available Film frame, do one of the following:
- Press F1 on the keyboard.
- If the Viewer Film/Save tab is open, click Image (F1).
- Use these steps to drag an image from a viewport to a frame in the film composer.
- From an image viewing application (Viewer, READY View , Volume Viewer, etc.), place the cursor over the image you want to film.
- Drag and drop the image to the desired frame on the Film Composer.
- Use these steps to change the Film Composer format to match the currently displayed format and place all the images into the Film Composer.
- Make sure the film composer is empty. If necessary, delete any images in the Film Composer.
- Set the image display to the desired format.
- Adjust the Window Width and Level as needed for each image.
- To place the currently displayed images into the Film Composer, do one of the following:
- Press F2 on the keyboard.
- If the Viewer Film/Save tab is open, click Page (F2).
- The Film Composer format changes to match the currently displayed format and places all the images in the into the Film Composer.
- You can change the Film Composer format after you have pressed F2.
- Use these steps to place the currently displayed images in a single frame on the Film Composer.
- When using the MID feature (2-on-1 or 4-on-1) for filming, the system automatically adjusts the image annotation to a reduced annotation level. Some image annotation fields are not displayed since the film real estate is limited. For example, FOV is not displayed. These parameters are not displayed even if you have selected Full Annotation from the Film/Save tab. For details on adjusting the annotation level, see Annotation level.
- Set the image display to the desired format.
- Adjust the window width and level as needed for each image.
- Set the Film Composer to the desired format.
- To place the currently displayed images in a single frame on the Film Composer, do one of the following:
- Press F3 on the keyboard.
- If the Viewer Film/Save tab is open, click MID (F3).
- When using the MID feature (2-on-1 or 4-on-1) for filming, the system automatically adjusts the image annotation to a reduced annotation level. Some image annotation fields are not displayed since the film real estate is limited. For example, FOV is not displayed. These parameters are not displayed even if you have selected Full Annotation from the Film/Save tab. For details on adjusting the annotation level, see Annotation level.
- Use these steps to film all or a portion of the images within a series.
- The Auto Print and Auto Clear options can be turned off and the system will continue to print and clear each film until it has filmed all images within the selected series.
- Set the Film Composer to the desired format.
- Adjust the Window Width and Level as needed for each image.
- From the Viewer, click the Film/Save tab.
- From the Film/Save tab, click the .
- From the Film control panel, specify the images to film.
- In the Format menu, select As is.
- Select Film Last Page to film the last page even if there are blank film frames.
- Select All, a range of slices, and every nth image, if you want to define a range of images.
- Click Film Series.
- The Auto Print and Auto Clear options can be turned off and the system will continue to print and clear each film until it has filmed all images within the selected series.
- To film a text page, see Text Page.
- Use these steps to remove an image from a Film Composer frame.
- Fill at least one frame.
- Place the cursor in the frame on the Film Composer from which you want to remove the image and click the image frame.
- Click Yes to the confirmation prompt.
- Click No to exit without erasing the image from the film.
- If you want to erase all images on the film, click Clear. Click OK to the confirmation prompt.
- Click Cancel to exit the Film Composer without erasing images from the film.
- To display the film status of the examination, series, and images currently being filmed, click the
 located in the footer area of the screen.
 - When there are no messages displayed below the icon, then filming is inactive.
- Use these steps to show (open) or hide the Film Composer.