Use these steps set up how the images are printed.
Step-by-step instructions
Open the Film Composer.
From the Film Composer screen, click Options.
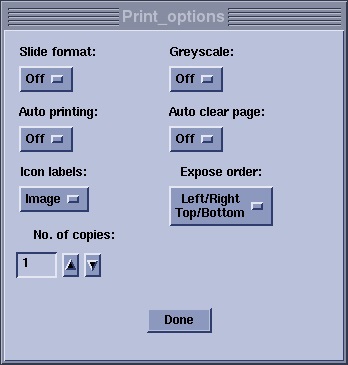
Figure 1. Print Options screen
Make selections from the Print Options screen.
Slide format: Select On to print slides if your camera is set up for slides.
Greyscale: Select On to display a vertical bar on the left side of the image with varying shades of grey from white to black.
Auto printing: Select On to automatically send the film to the printer when all frames of the film are filled. When off, you have to click Print to manually send the film.
Auto clear page: Select On to automatically clear the frames of the Film Composer when all the frames of the film are filled. When off, you need to click Clear to clear the film manually.
Icon labels: Select the image display method for the Film Composer file frames.
E/S/I displays the exam number/series number/image number in the frame.
Image displays a small picture of the image being printed in that frame.
Exposure order: Select the order in which the images are loaded when using the Function keys.
No. of copies: Enter the number of copies of film to be printed. If this number exceeds 1, the number is displayed on the Film Composer Print button.
Click Done to close the screen and save your selections.