

- 00000018WIA3039E770GYZ
- id_400235601.3
- Mar 25, 2022 3:41:36 PM
Job management
About this task
The Job Management feature also provides a history of archive and network events. The list allows you to check and verify that an exam/series/image has been sent to an archive or network node. If an entire exam or series has been selected, only one transfer is executed and one entry is displayed in the queue. If specific series or images have been selected, a separate transfer is executed and a separate entry is displayed for each selection. When saving images to a remote archive device such as a PACS, items queued to be saved remotely will be listed in the Archive Queue under the Remote archive list.
Use these steps to view a backlog of archive or network activity or to delete an archive or network job.
Step-by-step instructions
- From the header area of the screen, click the
 to open the Image Management work area.
 - From the Image Management work area, click the
 .
. - From the Job Management screen, click the Show jobs arrow and select an option to refine the lists.
- The Show jobs menu filters the list of Job Queue and Completed jobs displayed in the tables.
Figure 1. Example of the Show Jobs menu 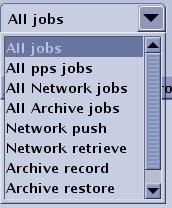
- The Show jobs menu filters the list of Job Queue and Completed jobs displayed in the tables.
- From the Job Queue list, select the jobs you would like to change.
- The Job Queue area displays the list of registered jobs as defined from the Show All Jobs menu.
- The Completed Jobs area displays when a successful transfer is completed the job is listed. The most recent job is listed at the top of the list.
Figure 2. Job Management screen 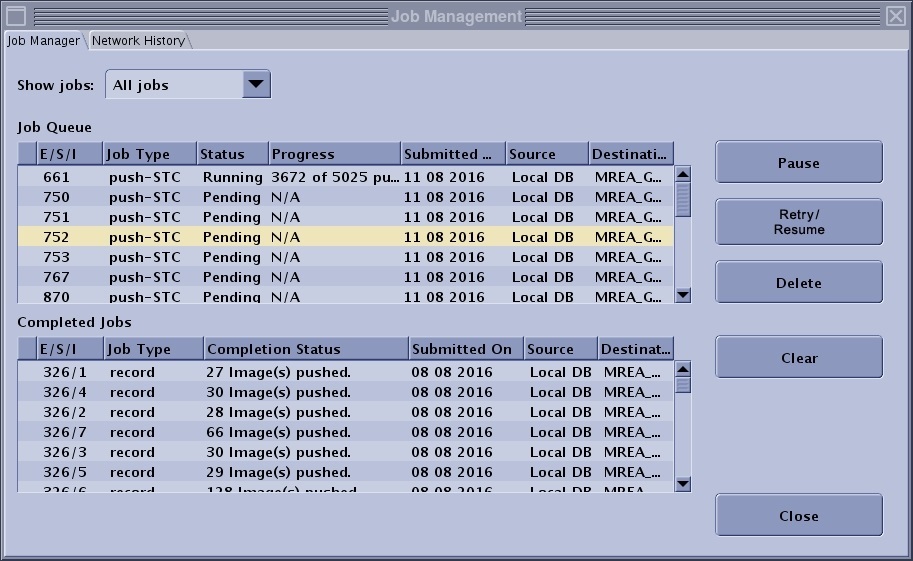
- Click an individual item.
- Or, press Shift and simultaneously click the first and last item.
- Or, press Ctrl and simultaneously click individual items.