

- 00000018WIA3054A970GYZ
- id_400244181.2
- Mar 9, 2022 11:31:59 AM
Volume Viewer workflow
About this task
MR General Review is a post-processing application for MR images. There are no limitations on the patient population.
If you added protocols to your favorite list, use these steps for a simple exam review in 7 steps.
Step-by-step instructions
- Select a patient to Review and launch MR General Review.
- For details, see: Open Volume Viewer procedure.
- The application launches with a format based on the number of series selected from the Loading Panel. Each viewport has an image from the selected series. MR General Review is the default Review Step visible.
- In this example, if one of your 8 series is a spectroscopy series it will wrap the first series to the 8th position to create an even format.
Figure 1. Example of 7 series selected from the Loading panel 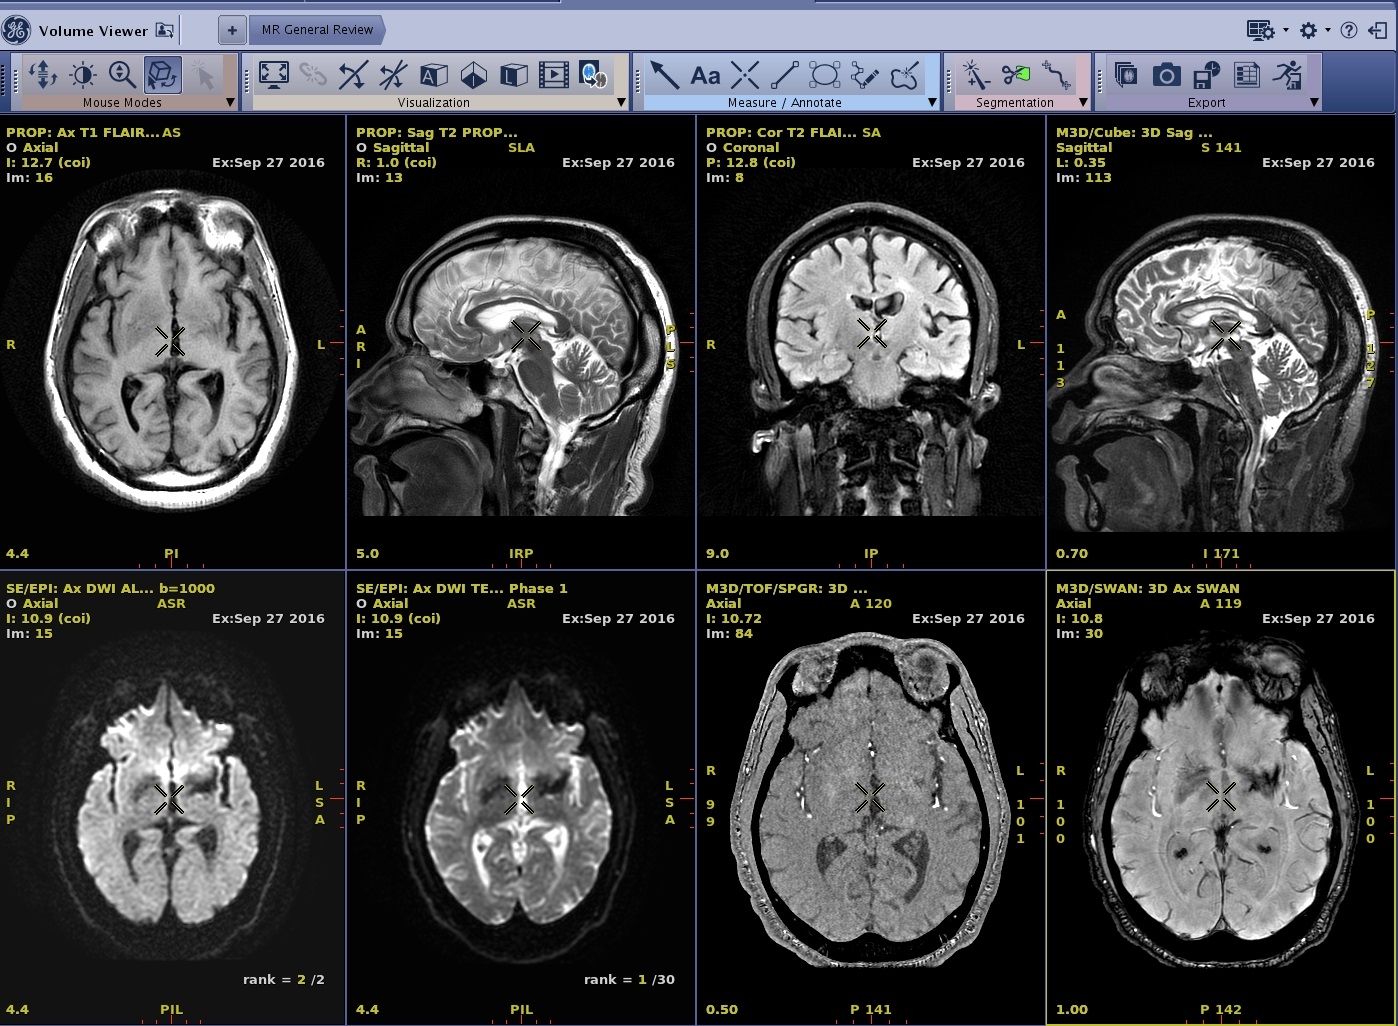
- Click the viewport of the series you want to view.
- Select the desired protocol.
- In this example, a multi-phase series is in the primary viewport and Brainstat AIF is selected from the

Figure 2. Select a protocol from the list 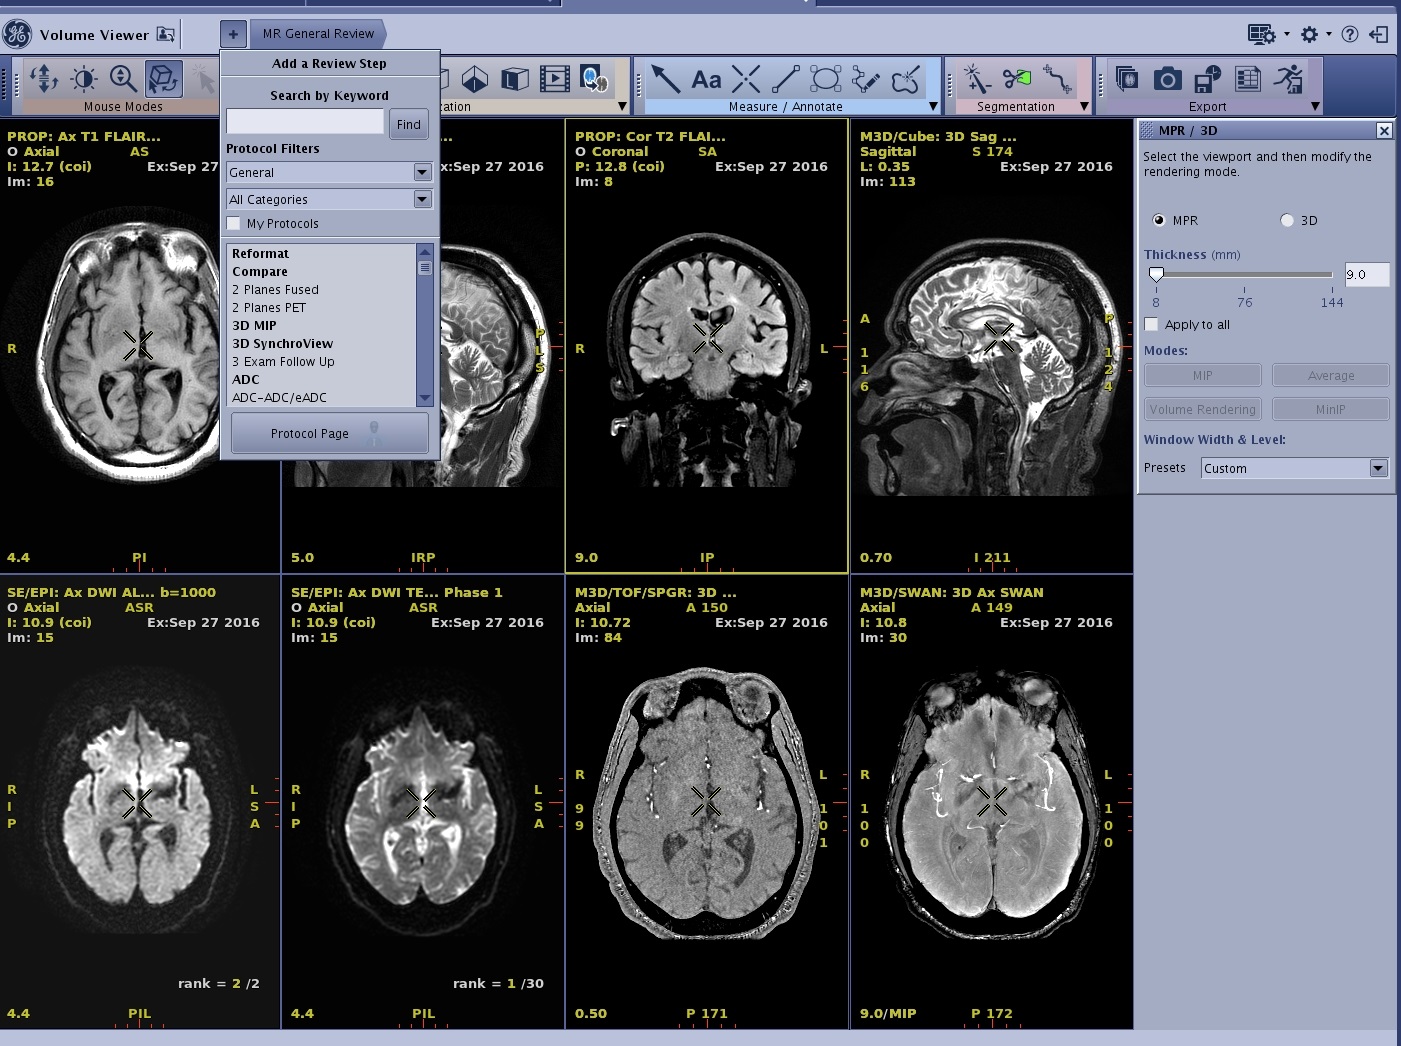
Figure 3. In this example, ADC is launched 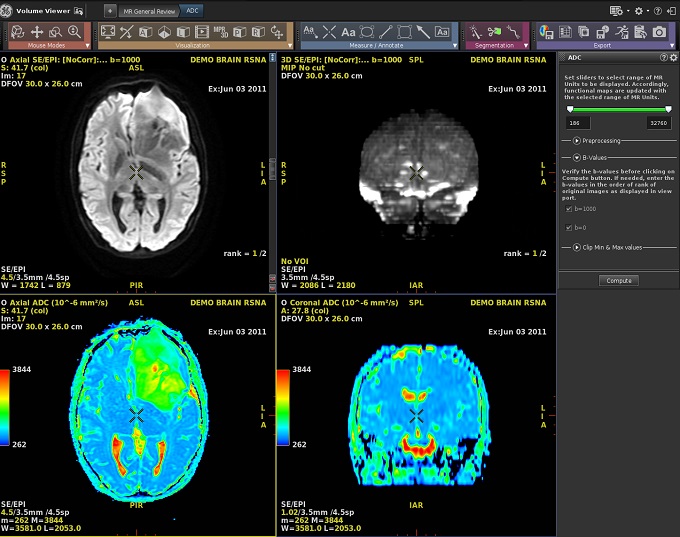
- In this example, a multi-phase series is in the primary viewport and Brainstat AIF is selected from the
- At any time, you can click to return to the 8 viewport display and then click another viewport and protocol.
- If you navigate to the Protocol screen, rather than re-launching the same protocol from the Protocol screen, click Back to the application to return to the currently active application.
- Page through the images and adjust Window Width/Level, Rotate, and Zoom.
- Use the Mouse Mode toolbar to select the icons below. Alternatively, you can customize the right-click menu and add any of the Mouse Mode icons to the top row of the menu. For details, see Toolbar preferences procedures
- To page through Axial, Sagittal or Coronal images, click the
 . Click the left mouse button and drag the mouse up and down.
 - To rotate oblique and 3D views, first from the pulldown menu select an Oblique/3D image type, then click the Page/Rotate mode icon. Press and hold the left mouse button while moving in the direction to rotate.
- To zoom click the
 and to pan select the
  . Click the left mouse button and drag the mouse.
 - To use select mode (to isolate or select viewports, fuse viewports), click the
 .
. - To adjust the Window Width and Level, click the
 . Click the left mouse button and drag the mouse to adjust the window width (left-right motion) or the window level (up-down motion). Note that you can always use the middle mouse button to change the W/L: middle-click and drag over the image. For more W/L details, see:
- From a 3D data set, create an MPR or Reformat image.
- Select the 2D view to change the slice thickness. Middle-click and drag to adjust the thickness in real time or left-click to decrease and right-click to increase the slice thickness. Alternatively, click the slider or type a desired value on the view.
- The small horizontal bars on either side of the single bar are used to adjust the MPR slice thickness.
Figure 4. 2D image 
- The small horizontal bars on either side of the single bar are used to adjust the MPR slice thickness.
- To work in 3D, set the view type to 3D.
Figure 5. 3D image 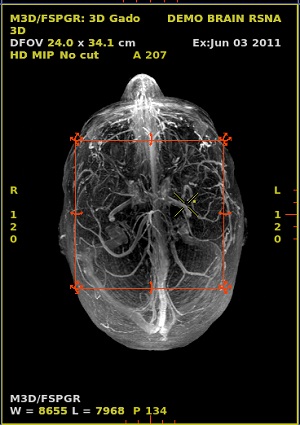
- Right-click the rendering active annotation and select an option from the available modes. In Figure 6 example, right-click MIP.
Figure 6. 3D View 
- Select the 2D view to change the slice thickness. Middle-click and drag to adjust the thickness in real time or left-click to decrease and right-click to increase the slice thickness. Alternatively, click the slider or type a desired value on the view.
- Make annotations, measurements as needed.
- Use the Measure/Annotate toolbar to select icons below and other measure/annotate tools.
- Click the
 to measure a straight distance.
 - Click the
 to view the voxel value.
 - Click a 2D ROI, for example
 to measure display and average voxel value inside a Region of Interest.
 - Click the
 to write a message on the viewport.
- Segment the images as needed.
- Use the Segmentation toolbar to select icons below and other segmentation tools.
Figure 7. Auto Select screen 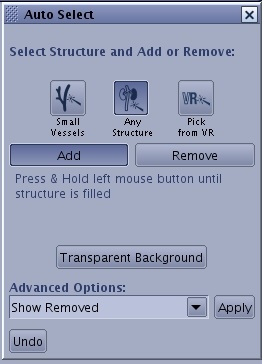
- Click the
 .
. - From the Auto Select screen, click the icon responding to the structure you want to segment and then click Add or Remove.
- For an optimized review of the displayed objects, click Transparent Background.
- Use other Segmentation tools as need.
- Click the
 to draw a structure to cut inside or outside the contours and to adjust the depth of the cut.
 - Click the
 or
or  for vessel tracking. Note the progress bar in the lower left corner of the screen.
- Click the
- Use the Segmentation toolbar to select icons below and other segmentation tools.
- Save images.
- Use the Export Toolbar to select the icons below and other Export tools.
- Click the
 to rapidly set up a set of regularly spaced images, preview the set as an animated sequence (rotation, loop or oblique) and film and/or save it.
 - Click the
 to capture a single viewport.
- Click the
- Use the Export Toolbar to select the icons below and other Export tools.
- When the review is finished, from the MR General Review upper right corner, click the
 .
.- Respond to any prompts, which vary based on your Export preferences.