

- 00000018WIA3016B970GYZ
- id_400243381.3
- Mar 29, 2022 2:25:29 PM
Use integrated integration for comparison of 3D images
Before you begin
- Integrated Registration provides a means for comparison of three-dimensional images. Once an initial transform has been defined, slices from both data sets are displayed with the same orientation, the display cursor is linked and graphics are drawn simultaneously on both data sets.
- In Integrated Registration protocols, the Link/Unlink feature (used for synchronizing the 3D cursor and performing registration) controls only the synchronization of the 3D cursor. When Integrated Registration is activated as a tool in Integrated Registration compatible protocols, the Link/Unlink feature works as defined in Volume Viewer. Note, however, that certain restrictions may apply to the Link/Unlink capabilities, depending on the actual protocol in which Integrated Registration is used as a tool.
About this task
Step-by-step instructions
- From the Patient list, click the two series to be aligned. In this example, the patient had a 3D T1 exam with and without contrast. Between the two series the patient was moved out of the scanner and sat up. Thus, the post contrast series is not completely aligned with the pre contrast series due to patient movement.
Figure 1. Patient list 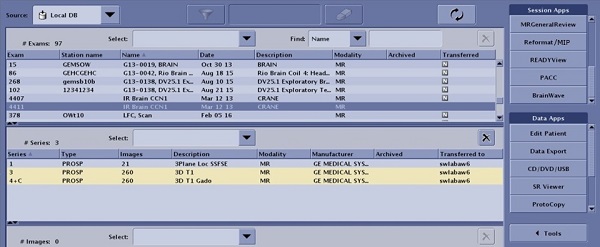
- If desired, from the Layout and Review options menu, select Split layout and 2 on 1 format to view the two data sets side by side. For details, see Use Split layout to add a customized view.
Figure 2. Example of layout with two series side-by-side 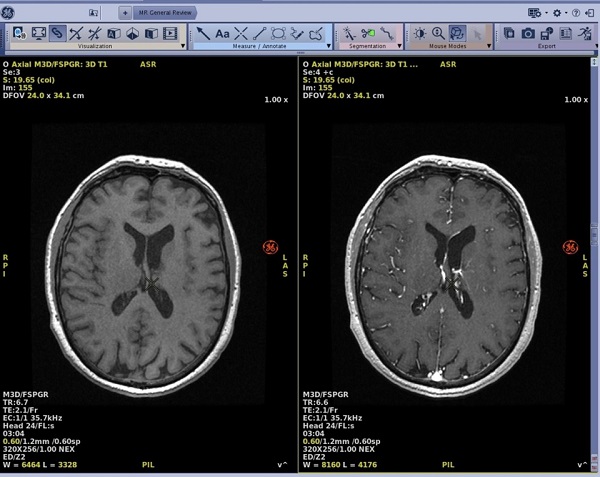
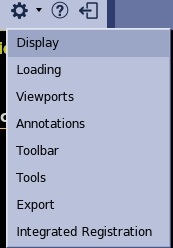
- From the MR General Review work area, in the upper right corner, click the Preferences icon (
 ).
).
- From the Preferences screen, click the Integrated Registration tab.
Figure 4. Integrated Registration tab 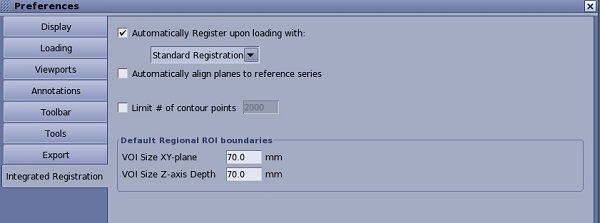
- To further optimize the image registration, from the Visualization toolbar, click the Integrated Registration icon (
 ) to view the Integrated Registration screen.
Figure 5. Integrated Registration screen 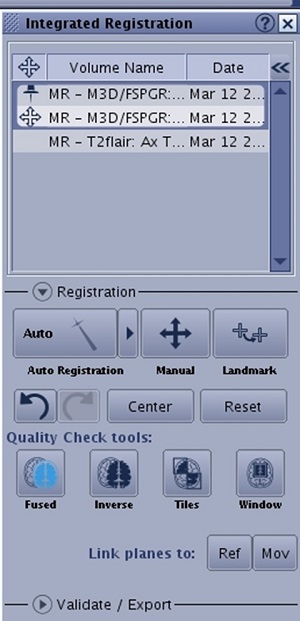
- From the Volume table list, if you are not satisfied with the results of the automatic Reference and Registered series selection, right-click a series and set it as Reference (
 ) or Registered (
 ).
). - From the Registration panel, the following options are available.
Table 1. Registration panel options Option Description Auto Registration 
Use to perform an automatic registration.Click the arrow to view a list of automatic registration algorithms available for a given Reference and Registered series pair. Note that registration algorithms are defined for Body and Neuro use cases (anatomies or protocols). Manual 
Use to perform a manual registration. Landmark 
Use to perform a landmark based registration. Undo/Redo 
Undo transform to undo the last rigid transformation performed during registration (including the transformations performed during placing landmarks).Redo transform to redo the last undone action. Center 
Use to center the fixed and registered volumes. Reset 
Use to reset the registered series to its original DICOM position. This takes effect on every series that is in the same group with the registered one. Quality Check Tools 


Use to check the accuracy of registration, (Fused, Inverse, Tiles and Window views). Link Planes 
Use to display all views either in the Reference or the Registered (i.e., moving) series’ plane. Reference is activated by default. - Make selections from the Validate/Export panels.
Figure 6. Validate/Export panel 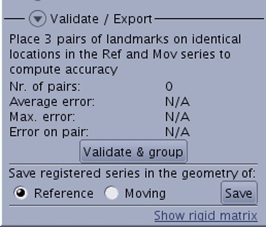
Figure 7. Export panel 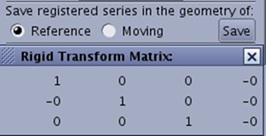
- From the Volume table list, if you are not satisfied with the results of the automatic Reference and Registered series selection, right-click a series and set it as Reference (