From the Visualization Toolbar, click the Trace icon () to open the Trace screen.
Figure 1. Trace screen
To create a trace, follow these steps.
From the Trace screen, select the trace type from the menu and click Apply.
Result
The active viewport is now blank and displays "undefined curve, profile or histogram." The text is based on the selected type.
Navigate to the desired slice on another viewport.
Press Shift and simultaneously left-click to deposit each point.
To stop the trace, release Shift.
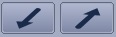
To move the trace, from the Trace screen, click one of the Trace Arrow icons ().
Enter the desired value in the text box next to the arrow icons to change the move increments.
To create more than one trace on the views, place the cursor in the viewport with the trace, and right-click Trace > Create trace. Start defining a new separate trace. If no traces have been defined, this menu item has no effect.
To edit a trace, follow these steps.
If you switch the type of trace (e.g., from segment polygon to curved smooth trace) and a trace already exists, the software recalculates the trace using the points you have already defined.
Simultaneously press the left Alt key and click on the trace.
Click and drag on the square markers to move the original points, or on the green triangle to split and adjust segments between points.
From the Trace screen or on-view menu, click Clear Trace to remove the trace completely or click Clear Last Point to remove the last point deposited.
To lock the 3D cursor to a trace, follow these steps.
From the on-view menu, click Trace > Lock cursor to trace.
Press Shift and move the mouse pointer. The 3D cursor follows the mouse pointer up and down, or left and right, while remaining constrained to the trace.
Do not click the cursor over the trace, simply move the mouse so that the cursor follows the contours of the trace. If you click and drag the mouse, a warning message displays.
Place the cursor in the viewport with the trace, right-click Trace > Unlock cursor.
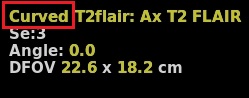
To return the traced viewport to another view, in the upper left corner, click the active view annotation and select another view.
Figure 2. Active view annotation example of Curved


 ) to open the Trace screen.
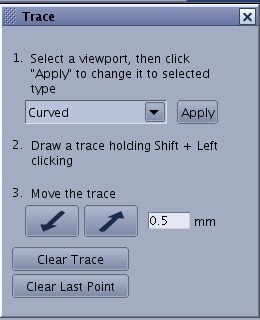
 ).
).