About this task
Use these steps to display three oblique planes defined by three adjustable color axes (orange, green, blue).Step-by-step instructions
- From the Patient List/Browser, select a series that you want to reformat.
- Open a MR General Review application.
- If needed, click the View Type active annotation in the upper left corner and select Oblique.
- Click another viewport to make it the primary viewport.
- From the Visualization Toolbar, click the Multi Oblique icon (
 ).
).Result
The oblique planes are defined by three adjustable color axes (orange, green, blue).
- Select the intersecting lines to move the center of the rotation.
Figure 1. Multi-oblique intersecting lines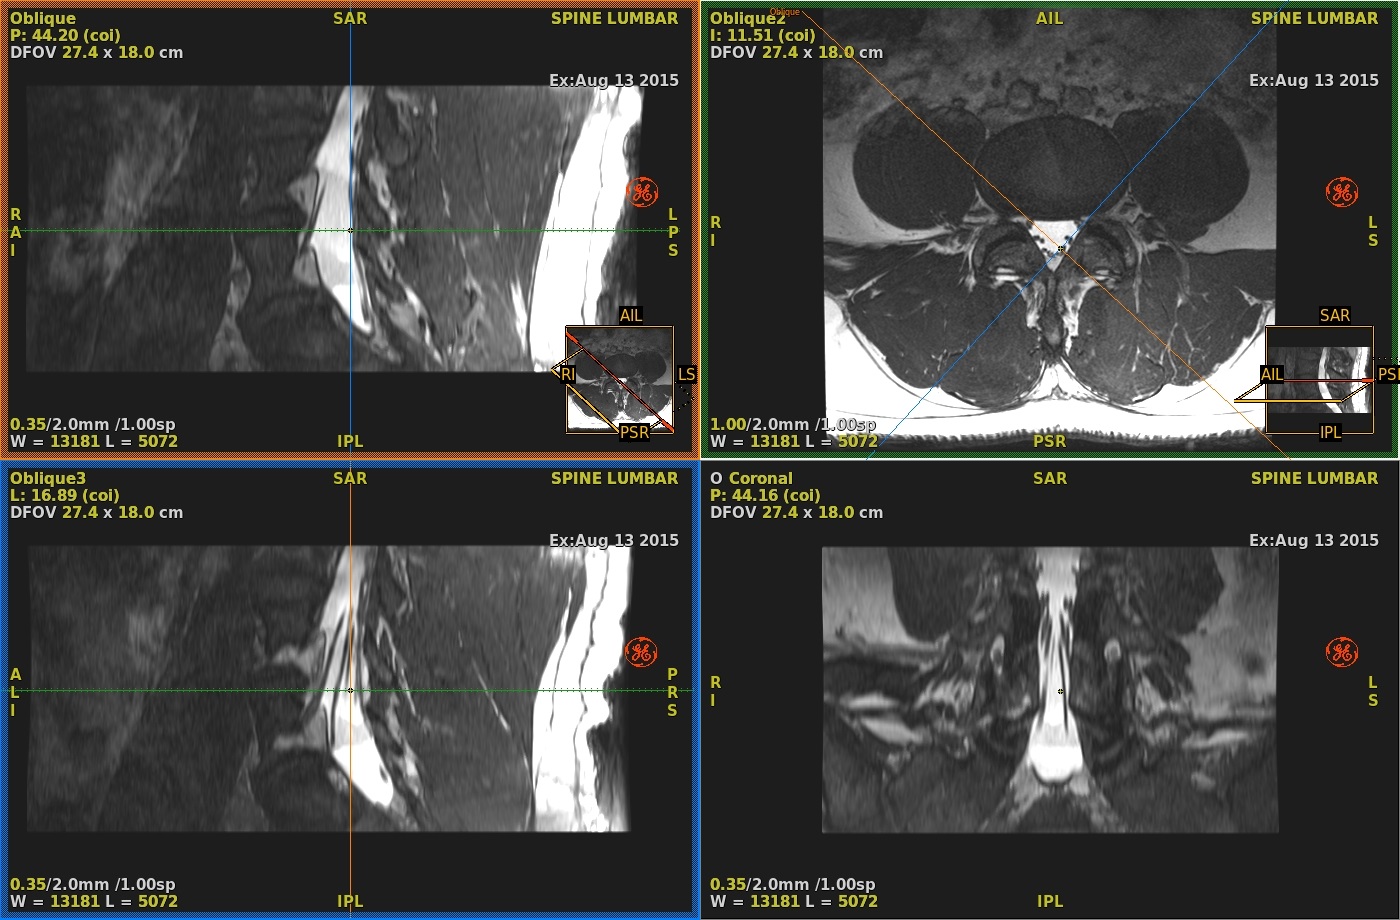
- Adjust any axis to update the two other oblique planes.
- Click the Multi-Oblique icon again to de-activate the mode.
Result
The orientations defined stay in the oblique viewports.

