

- 00000018WIA30DEC770GYZ
- id_400254311.6
- Aug 14, 2022 1:06:29 PM
Anatomical Region for the selected series
About this task
Step-by-step instructions
- From the Edit menu, click Change/Select Anatomy.
Figure 1. Set Anatomy window 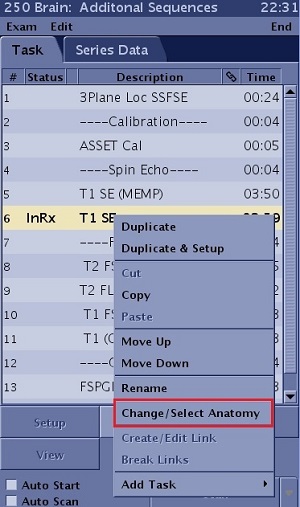
- Place the cursor over the anatomy area of interest and an expanded menu appears to the right. Click the anatomical region of choice from the expanded menu.
Figure 2. Anatomical Region menu 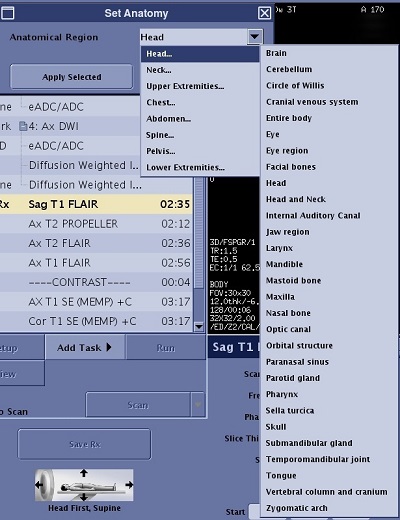
- From the Set Anatomy screen, make a selection.
Figure 3. Set Anatomy screen 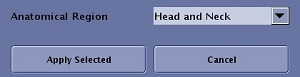
- Click Apply Selected to apply the Anatomical Region to the selected series.Since all series must have an Anatomical Region, it may be preferable to select all series in the workflow manager and then assign one anatomical region. To select all series, select the first series, press and hold Shift, and then select the last series.
- Click Cancel to close the Set Anatomy screen without applying the Anatomical Region.
The task cannot be saved (Save Rx is not enabled) until an Anatomy selection is made and accepted.
- Click Apply Selected to apply the Anatomical Region to the selected series.