

- 00000018WIA3095F770GYZ
- id_400247951.2
- Mar 10, 2022 11:38:05 AM
Rotate or translate image
About this task
Use these steps to typically step through a reformatted or 3D image.
Step-by-step instructions
- From the Visualization Toolbar, click the
 .
. - To rotate the images around a central axis, follow these steps.
- Click the viewport from which you want to rotate the images.
- From the Rotate/Translate screen, click the Rotate tab.
Figure 1. Rotate tab 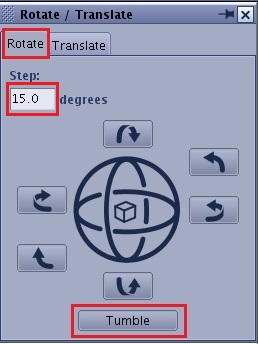
- In the Step text box, enter a value for incremental movement in degrees.
- Click an arrow to move the active plane in the desired direction indicated by the arrow.
- Click in the center of the sphere to switch to an Anterior view.
- Click Tumble to view a short movie loop that provides a slight rocking movement to the 3D Model.
- An alternative method to rotate an image is to click and drag any of the corners or points between each line.
Figure 2. White boxes indicate several of the rotation handles 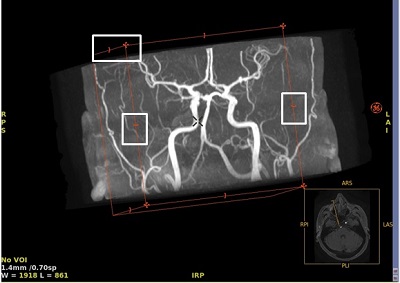
- To translate through the 3D or reformatted images, follow these steps.
- Click the viewport from which you want to translate the images.
- From the Rotate/Translate screen, click the Translate tab.
Figure 3. Translate tab 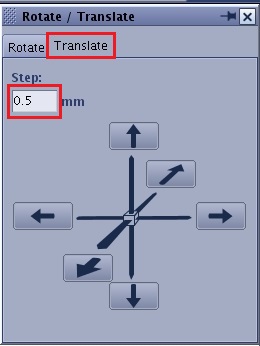
- In the Step box, enter a value in millimeters for incremental movement.
- Click an arrow to step through the reformatted image.