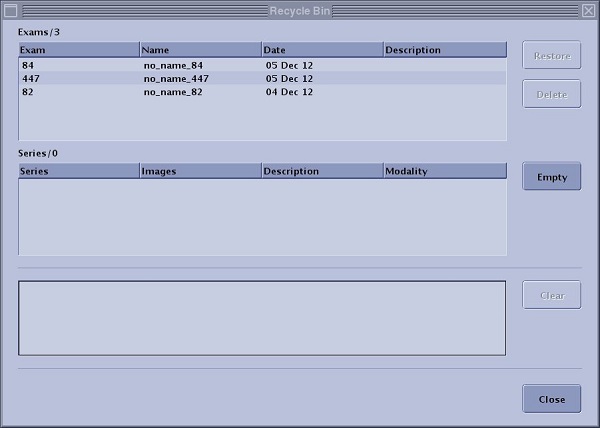
Exam, series, or images are stored in the recycle bin. They can be restored to the Patient List, permanently deleted from the MR system and the recycle bin can be emptied.Figure 1. Browser Recycle Bin
Step-by-step instructions
Follow these steps to empty contents from the recycle bin.
From the Browser, click the to open the Recycle Bin screen.
Click Empty.
Respond to any confirmation prompts.
The recycle bin is emptied and therefore you cannot retrieve any exams/series.
To clear the message area, click Clear.
Follow these steps to retrieve images that have been deleted from the Patient List but are not archived.
Images that have been deleted before archiving are placed in the Recycle Bin.
From the Browser, click the to open the Recycle Bin screen.
Click the exam to display the series associated with the exam.
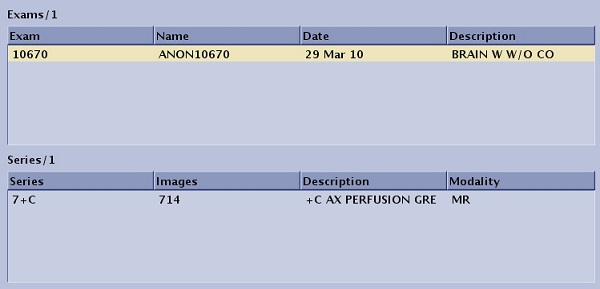
When an exam is selected from the Exam list, all the series associated with the exam are displayed. Figure 2. Exam/series list
Select the exam/series you want to retrieve.
Click an individual item.
Press Shift and simultaneously click the first and last item.
Press Ctrl and simultaneously click individual items.
Click Restore.
The images are returned to the Patient List.
When an exam or series has successfully been restored from the Recycle Bin to the system's hard drive, a message is posted at the bottom of the Recycle bin screen. Figure 3. Message area
To clear the message area, click Clear.
Follow these steps to permanently delete exams/series from the hard drive.
From the Browser, click the to open the Recycle Bin screen.
Click the exam to display the series associated with the exam.
Select the exam/series you want to delete.
Click an individual item.
Press Shift and simultaneously click the first and last item.
Press Ctrl and simultaneously click individual items.
Click Delete.
Respond to any confirmation prompts.
The images are permanently deleted from your system's hard drive.


 to open the Recycle Bin screen.