- 00000018WIA302CD870GYZ
- id_400250521.2
- Dec 21, 2021 2:21:38 PM
Aortic valve plane
About this task
Step-by-step instructions
- From a short axis view, prescribe (yellow line indicates graphic location) and acquire a 4-chamber view.
Figure 1. Prescribe 4-chamber view 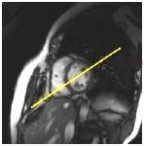
- From the 4-chamber view, prescribe (red line indicates graphic location) and acquire a short axis view.
Figure 2. Prescribe short axis view 
- From the short axis view, prescribe (red line indicates graphic location) and acquire a basal short axis view.
Figure 3. Prescribe a basal short axis view 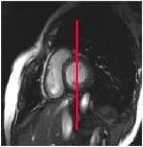
- From the basal short axis view, prescribe (orange line indicates graphic location) and acquire a left ventricular outflow tract view.
Figure 4. Prescribe left ventricular outflow tract 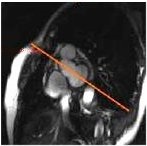
- From the left ventricular outflow tract view, prescribe (red line indicates graphic location) and acquire aortic valve view.
Figure 5. Prescribe aortic valve 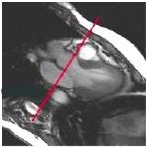
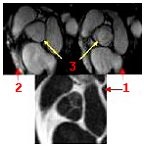
- View resulting aortic valve image.
Figure 6. In this example, 3 = aortic valve, 1 = open, 2 = closed.