Use these steps to open or launch READY View when you want to view multiple series such as DTI and FiberTrak READY View protocols.
Step-by-step instructions
From the header area of the screen, click the to open the Image Management work area.
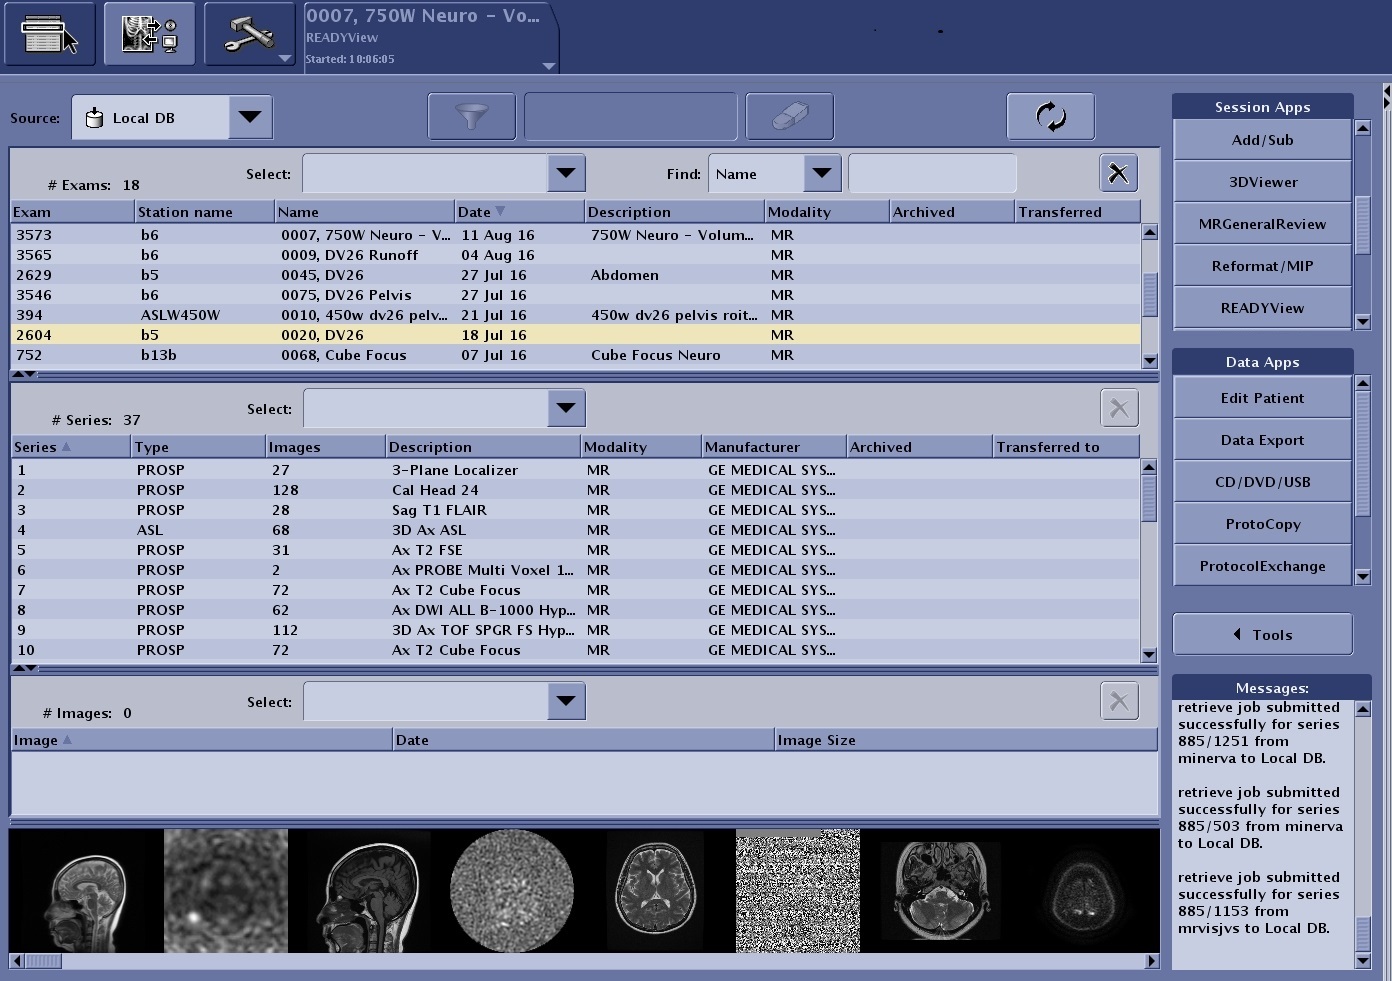
From the Patient List, select a functional exam.
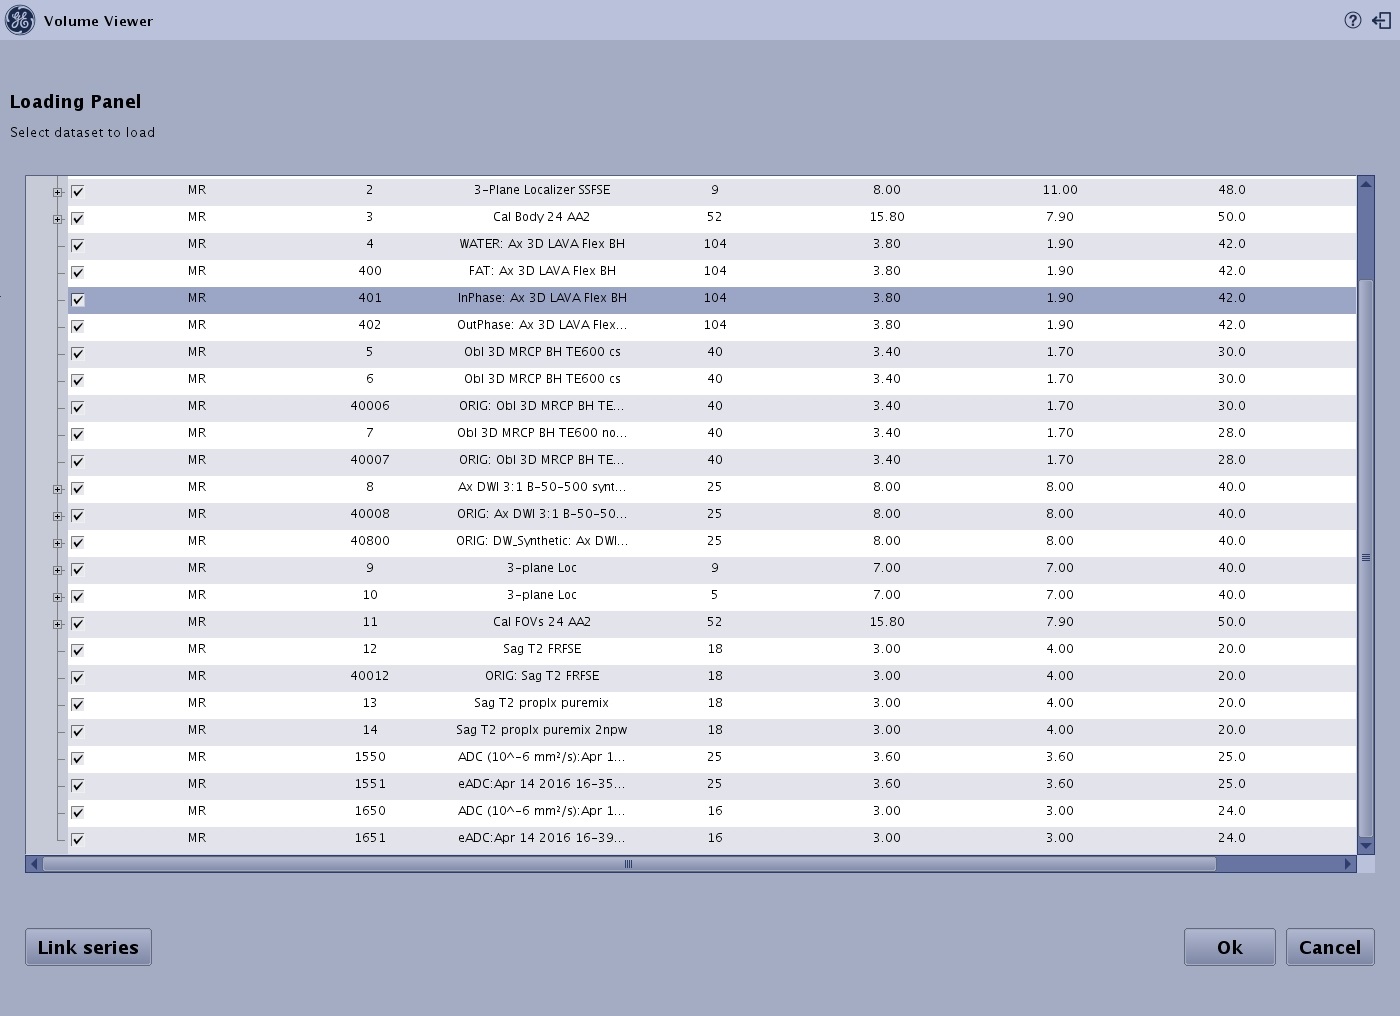
All series within the exam are automatically displayed in the loading panel.
The multiple series you select are the series that are loaded into READY View. Figure 1. Example of an exam that has multiple series that can be processed in READY View
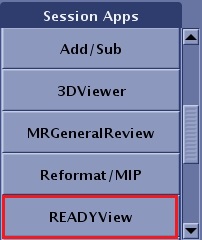
From the Session Apps List, click READY View.
Figure 2. READY View application on the Session Apps list
Select the desired protocol from the Protocol Selection screen.
The display of protocols in the Application Selection screen is conditional to the series content of the selected exam. For instance, if one of the series is DWI, protocols that contain ADC functional maps calculation are displayed.
If the protocol you would like to launch is not displayed, enter a keyword in the Search by Keyword field or check the Show non-compatible option box.
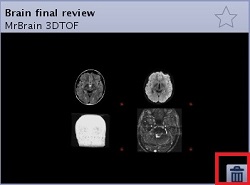
The top area of the Application Selection screen provides protocol filters to modify the displayed protocols by anatomy or processing type such as READY View, Oncology, Vascular, Integrated Registration, etc. Figure 3. Trash can icon appears with scenarios you have created
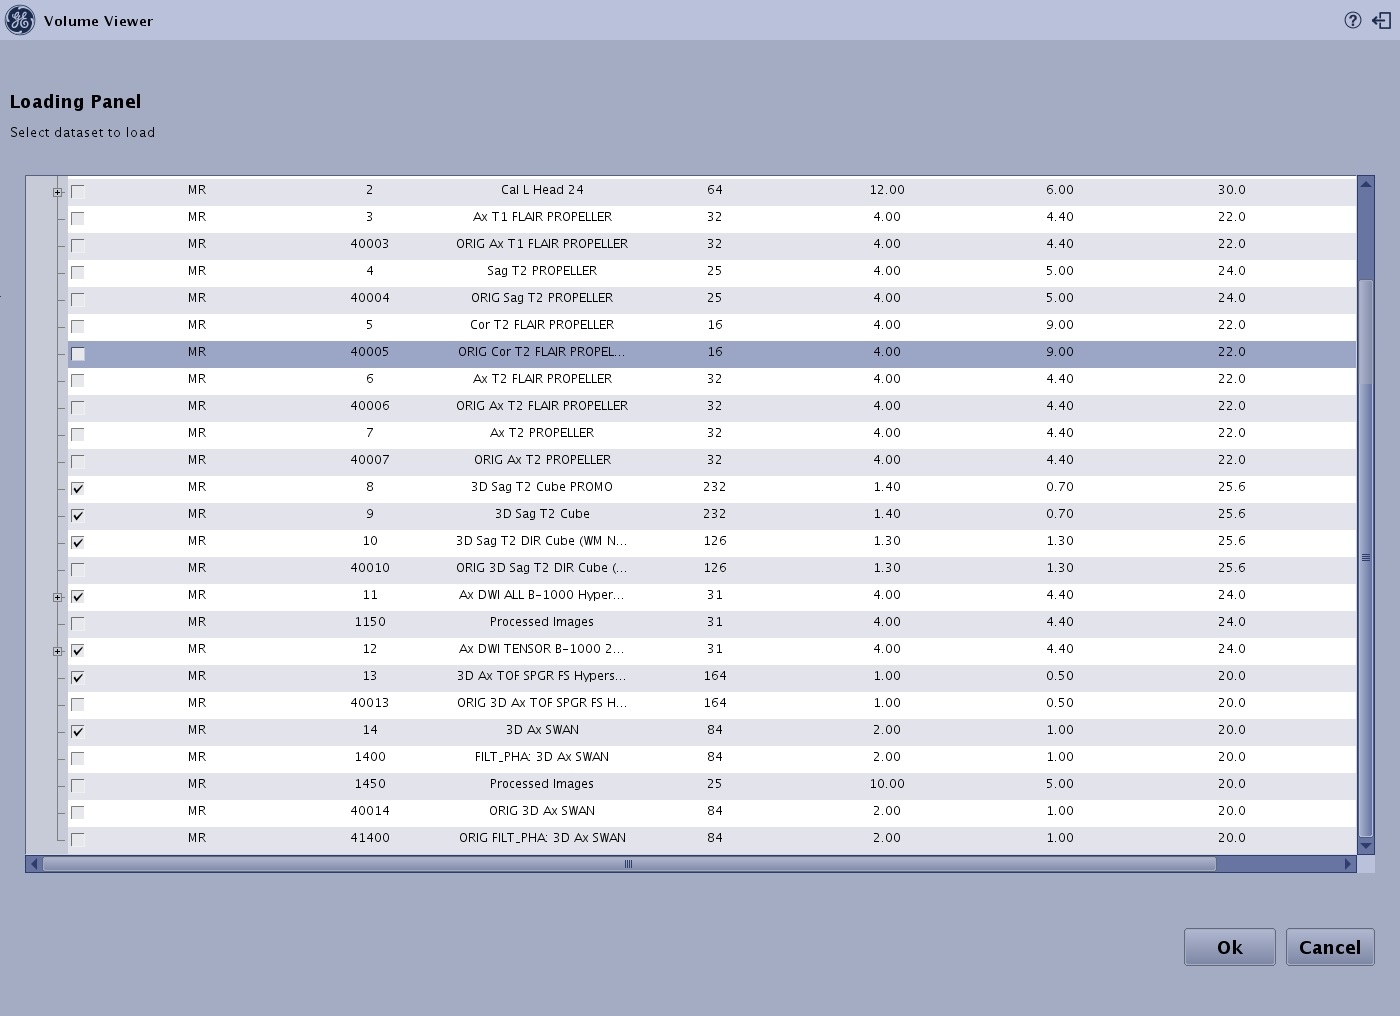
From the Series Loading Panel, complete the following steps:
Figure 4. Load panel
Review the checked contents.
The Loading Panel displays the source series first, followed by the in-line processed series (generated during the exam procedure or from a previous READY View session), and last, the secondary capture series in a separate zone.
Once the session is launched, it is still possible to add series into the session through the Mini-Patient List.
Select the desired series and secondary capture series that you want to use in the analysis.
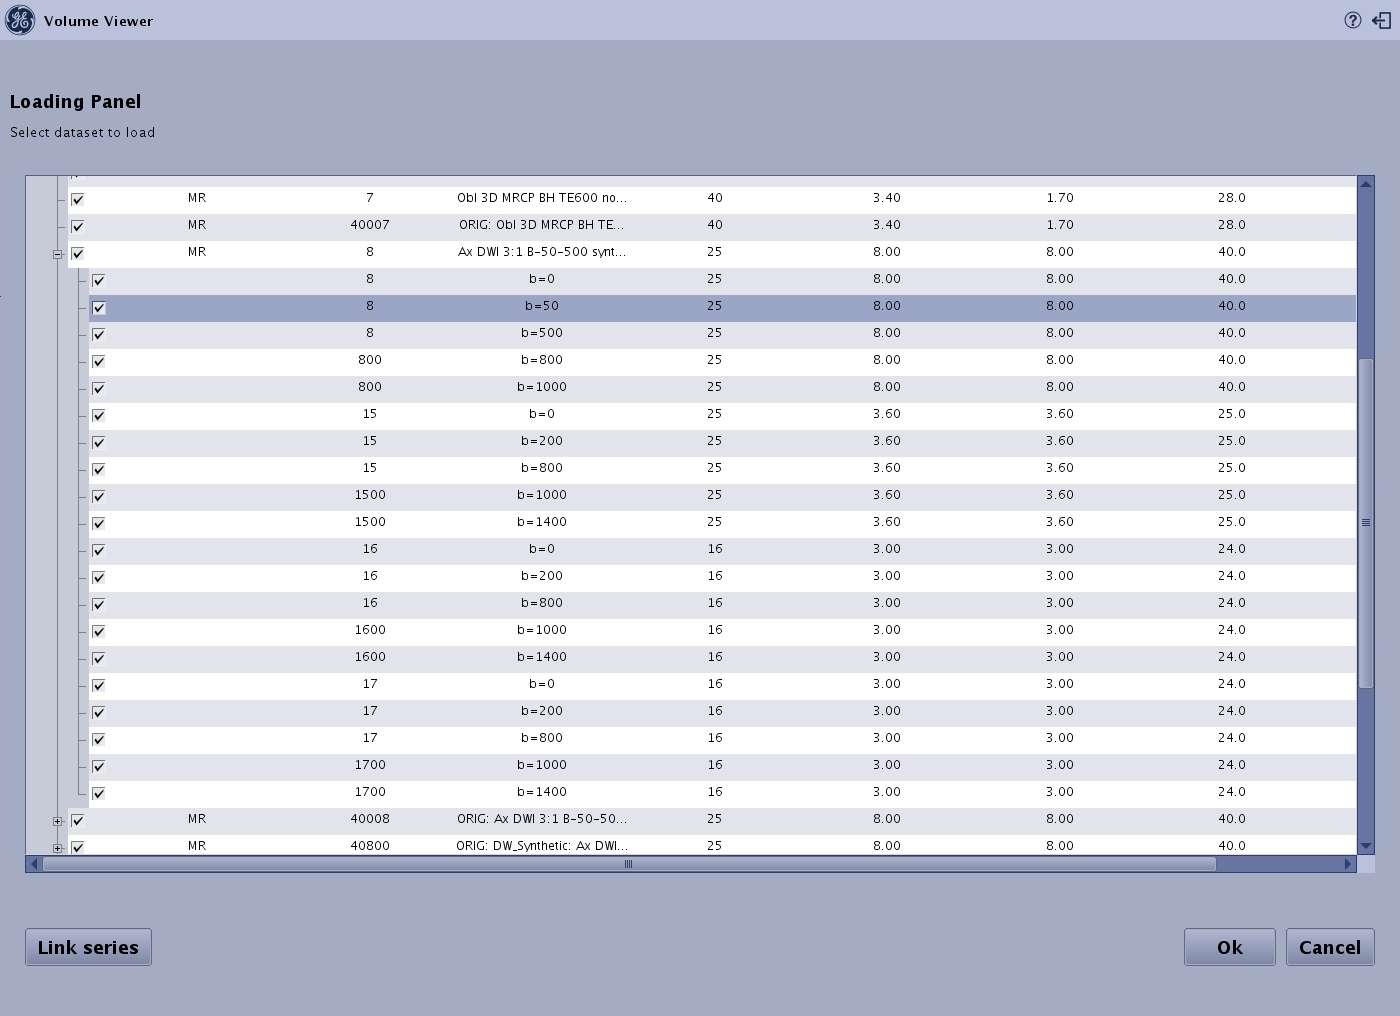
If there are multiple series that you want to work as a single, continuous data set, then use the Link Series option, as follows. For example, you may want to combine all b-values series into a single data set, or combine the pre and post contrast series into a single data set.
First, deselect all series at the exam level.
Next, select the box of the 1st series, and click the (+) button beside the box, which opens the series content. For example, in the scenario of a multi-phase pre and post-contrast acquisition, it may show the individual phases. Note that you cannot select a subset of images within the series.
Next, select the box of the 2nd series, and also click the (+) button. Figure 5. Series selected that you want to link
Click Link Series. The second linked series is no longer listed and its content is added to the content of the first linked series. Click the (+) button to see the new series content. Figure 6. Series are linked
Continue and select all other desired series.
Click OK. The system loads the selected images into the READY View work area. To go back, click Cancel.
The Review steps are displayed once all files are loaded.
From the Review Steps, select any step to view a particular application or series and adjust the images as desired from the application/protocol screens.


 to open the Image Management work area.