Use these steps to generate a multiplanar or 3D image.
If using Filter Floaters to remove small residual objects in the 3D model that can appear after thresholding, usually resulting from noise in the original image set, consider this:
Warning
Floater filtering removes all 3D objects from the displayed 3D volume that have a size equal to or smaller than the selected filter size. Before applying a filter, make sure that the selected filter size will not result in removing pathologies or other essential anatomical structures.
Step-by-step instructions
Open the MR General Review.
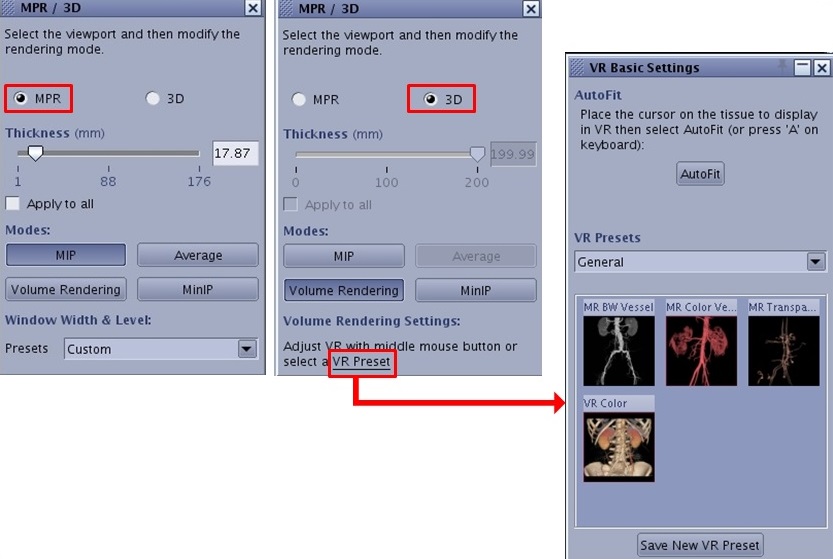
From the Visualization Toolbar, click the MPR/3D icon () to open the MPR/3D screen.
Figure 1. MPR/3D screen
From the MPR/3D screen, click an image option type: 3D or MPR.
For an MPR view, click and drag the scroll bar or enter a value into the Thickness text field to set the slice thickness.
3D sets the thickness to the largest size, which is based on the FOV. For example, If the FOV is 32 cm you can change the slices thickness from 0 to 320 mm.
Click Apply to all if you want the changes applied to all the slices.
For a 3D View, select a display algorithm mode.
MIP (Maximum Intensity Projection): the pixel value is the maximum voxel value along the projection.
Average: the pixel value is the average of the voxel values along the projection (sum of the voxel values divided by the number of voxels).
Volume Rendering: Allows different density levels. For details, see the Volume Rendering section in Getting Started.
If 3D is selected, adjust the VR with middle mouse button or select a VR Preset.
MinIP (Minimum Intensity Projection) : the pixel value is the minimum voxel value along the projection.
If desired, select a Window Width and Level option from the Preset menu.


 ) to open the MPR/3D screen.