Use these steps to place IR SAT bands on a localizer that allows them. The IR icon is only visible on the Graphic Rx Toolbar with PSDs that allow an IR SAT pulse.
Step-by-step instructions
Select a compatible PSD that allows manual application of IR SAT bands.
From the Details tab, select Auto IR Band Off.
This allows you to manually apply IR SAT bands on sagittal, coronal and oblique scans.
Save Rx is disabled until you place the SAT bands.
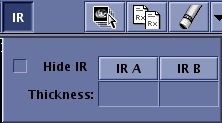
Click the desired IR SAT band.
Figure 1. IR SAT menu
Note: You can apply both IR A and IR B SAT bands.
The default thickness is automatically displayed. Place the cursor in the Thickness text field and type a new thickness if desired.
Place the cursor on the localizer image and click to deposit the IR SAT band.
If desired, click IR A or IR B to toggle the IR SAT bands on/off to better visualize the slice locations.
From the IR menu, click Hide IR to toggle the IR SAT bands on and off from the viewport.
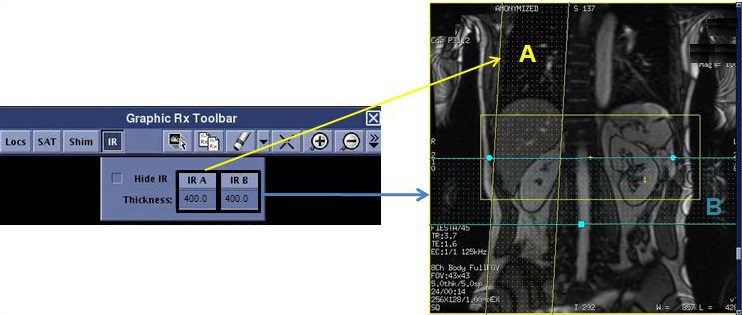
This helps you to better visualize the anatomy when placing Graphic Rx scan locations.Figure 2. Inhance Inflow IR localizer with IR SAT bands


 Note: You can apply both IR A and IR B SAT bands.