

- 00000018WIA3093D770GYZ
- id_400221531.4
- Apr 13, 2022 4:01:59 PM
2D
Before you begin
About this task
- If the slice location lines that have been saved in a protocol are orthogonal, when they are applied to the localizer image the slices are applied in the same fashion that they were saved in the protocol.
- If the slice location lines that have been saved in a protocol are oblique, when they are applied to the localizer image the slices are applied right to left. The start/end locations change to reflect this state. To obtain a left-right slice prescription that was originally saved in the protocol, the slices must now be rotated (3D or 2D), or erased and prescribed again (2D only).
- To select a viewport other than the default viewport, click it to make it active.
- You can only tilt the slices if oblique is the selected plane.
- If oblique is the selected plane, each group of slices can have a unique orientation.
Use these steps to prescribe a 2D acquisition.
Step-by-step instructions
- Click to deposit the first line of the 2D graphic tool.
Figure 1. Orthogonal 2D Graphic tool 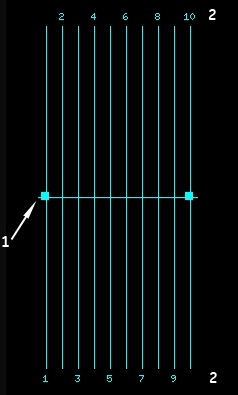
Table 1. Orthogonal 2D Graphic tool image legend Number Description 1 Add handle 2 Slice numbers Figure 2. Oblique 2D Graphic tool 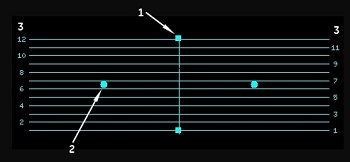
Table 2. Oblique 2D Graphic tool image legend Number Description 1 Add handle 2 Rotate handle for oblique scan plane - If you have selected SAT to deposit saturation pulses, to change the function of the left-click from SAT to Graphic Rx, click the
 from the Graphic Rx toolbar.If you have a multi-slice multi-group scan prescription, the total number of slices is displayed on the graphic Rx viewport.
Figure 3. Multi-slice, multi-group localizer 