

- 00000018WIA3076A970GYZ
- id_400221021.2
- Mar 9, 2022 6:17:34 PM
Create a protocol
About this task
Use these steps to create a custom protocol.
Step-by-step instructions
- From the Loading Panel complete the following steps.
- Click the series you want to include in the protocol.
- Click Ok.
Figure 1. This example shows DTI, EPI, 3D Bravo, 2D CSI, and Axial T2 FLAIR series selected 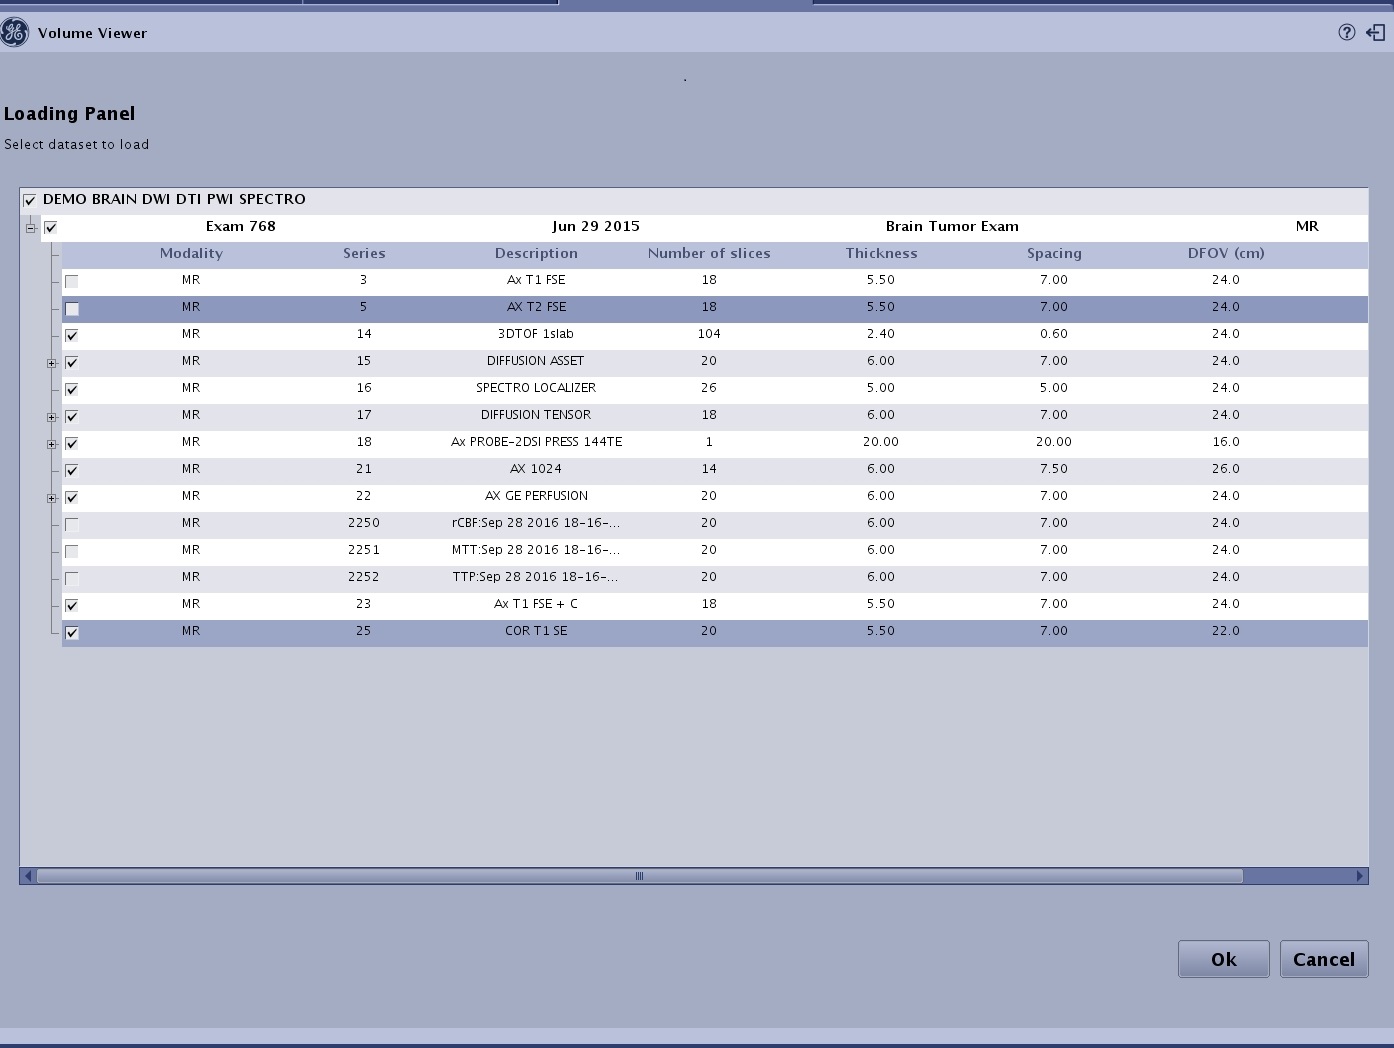
- In the above example, MR General Review loads the six series in a grid layout. Note that the The 2D CSI series with its paired axial series isn’t displayed on the initial launch.
- If a different layout is desired, complete the following.
- Click the
 located in the upper right corner of the screen.
 - Layout and Review options menu select Split layout.
- From the Figure 2, select one of the pre-defined layouts.
- Alternatively, click the Figure 3 and add a viewport, split a viewport (linked or unlinked), or delete the primary viewport and when all selections are done, click Save your Presets.
- For more details, see Split layout custom procedure.
- Click the
- If a different series is desired for a viewport, complete the following.
- Click the
 from the Review Steps area, to open/close the Mini Patient List screen.
 - From the Figure 1, click and drag the desired series to the selected viewport.
- To close the Mini Patient List screen, click the X in the upper right corner of the screen.
- Click the
- To add a Review step to your protocol, follow these steps that use an example of adding a DTI step.
- Repeat these steps for each Review Step you want to add to your protocol.
- Option 1: From the MR General Review steps area, click the
 to view the Figure 1. From the Add a Review Step screen, click the desired protocol in the list and it is added to the Review steps.
 - Option 2: In the upper right corner of the screen, click the > Review Manager. Drag and drop a protocol from the Protocol List to the Review Steps list. Make sure that the protocol you drag is dropped between any review steps. If you drop it at the end of the list, an invalid drag symbol appears. Note that once it is dropped in the Review list, it is automatically moved to the bottom of the list. Use the Move Up and Move Down buttons to change the Review Step location.
Figure 2. Drag and drop a protocol to the Review Steps list 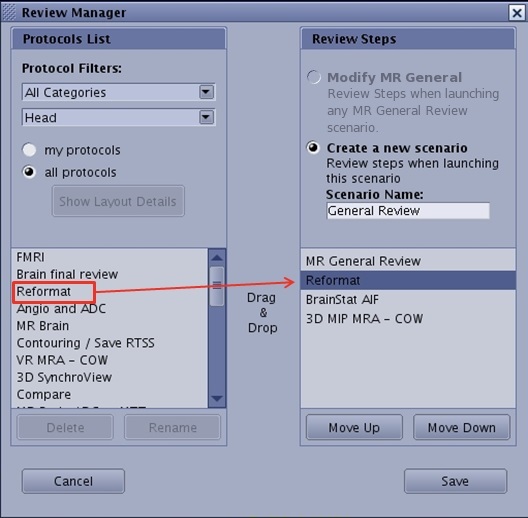
- Option 1: From the MR General Review steps area, click the
- Repeat these steps for each Review Step you want to add to your protocol.