

- 00000018WIA30B3C970GYZ
- id_400231571.3
- Mar 25, 2022 3:58:37 PM
Save images
About this task
The DVD read/write speed varies between computer models. Note that USB flash devices provide the fastest means for saving images.
Step-by-step instructions
- From the Data Apps list, click CD/DVD/USB to open the Compose screen.
Figure 1. Compose screen 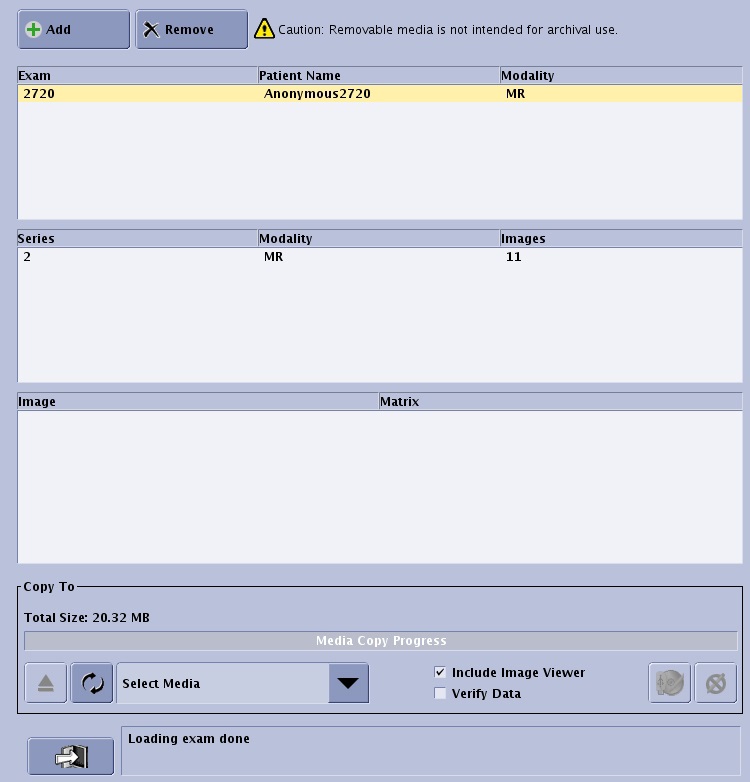
- Typically, the Compose screen appears on the Image Management desktop when you click CD/DVD/USB. If it does not appear, it is because it has been minimized. To view the screen, click the arrow in the upper right corner, next to the Session Apps list to collapse or expand the screen.
Figure 2. Arrows expand and collapse the Compose screen 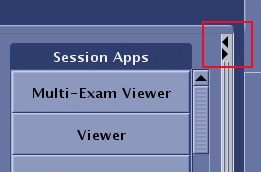
- Typically, the Compose screen appears on the Image Management desktop when you click CD/DVD/USB. If it does not appear, it is because it has been minimized. To view the screen, click the arrow in the upper right corner, next to the Session Apps list to collapse or expand the screen.
- From the CD/DVD/USB Compose screen, select the media type from the Media menu.If you opened the Compose screen before you inserted a device into a drive, click
 to update the Select Media menu.
 Figure 3. Media menu 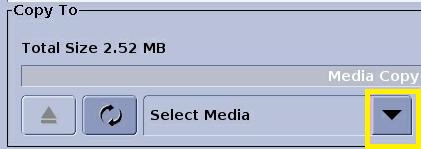
- To save a Viewer with the images, click Include Image Viewer.If you do not select Include Image Viewer, then you cannot view the images on a PC or laptop. The purpose of saving the images without the Viewer is to transport them to another compatible MR system.
Figure 4. Include Image Viewer option 
- To check that the data has successfully been transferred to the media, click Verify Data.
Figure 5. Select Verify Data 
- Click
 to start the recording process.
- Do not begin recording until all desired series have been added to the list. You cannot record more data to the CD-R or DVD-R once you have started the recording process.
- The message/progress bar displays messages and a progress bar indicating the progression of the copy activity.
Figure 6. Progress bar (1) and message area (2) 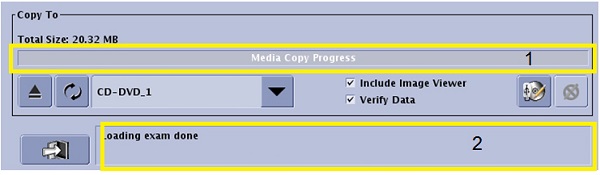
- Error prompts may appear if the media is damaged, if the media is not blank, the files are too large for a single media, etc.
- The progress bar displays 100% and a message appears in the message area when recording is completed.
- Very large data sets (typically fMRI) can take a very long time (more than one hour) to copy to CD. If you change your mind about copying the files to CD/DVD, you can quit copying and start it over at a time more convenient. Click Quit to cancel the copy process and upon clicking OK to the confirmation prompt, the copy process is stopped and the Composer screen closes. An alternative is to click Cancel.
 stops burning data.
- Once the recording is finished, click
 to close the Compose screen.
- If you click Close before the completion of the save process, a confirmation prompt appears. If you confirm the request to close, then the save process is canceled.
- When the contents have been burned to the media, a message is posted in the Message area. It is now safe to remove the media.
- For a CD/DVD media, the drive automatically opens when the CD/DVD save is finished.
- For a USB media, click the
 from the CD/DVD/USB Compose screen to remove the media from the drive. Do not remove the USB device during the copy process. Removing the USB device without ejecting it can result in errors that may require the device to be reformatted.