Use these steps to restore images to your system from a remote host.
Step-by-step instructions
From the header area of the screen, click the to open the Image Management work area.
Click Source and select a remote device or node.
Figure 1. Source menu
If the node is not available, a message appears. Read the message and click OK.
The node must be configured to receive a query. Check SCP Settings on the Configure Network Host screen to verify that all the SCP settings have been checked (Allow to query, Allow to retrieve, Allow to send).
Optional: Refine the remote Patient List:
Click the to open the Filter Data screen.
Figure 2. Patient List Filter Data screen
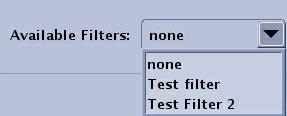
Click Available Filters and select a filter or type text into the desired fields.
Figure 3. Available Filters menu
Click OK to apply the filter.
The filtered Patient List is displayed.
To return to the non-filtered Patient List, click the .
From the remote Patient List, select the exam, series, or images you want to retrieve.
Click an individual item.
Press Shift and simultaneously click the first and last item.
Press Ctrl and simultaneously click individual items.
In the Destinations area of the Patient List, click Local DB to begin the restore process.
View the archive status or the network status in the footer area of the screen to view the state of the images as they are transferred to the local database.
The Job Manager icon displays the network status of the examination, series, and images currently being networked and the destination location.
The Archive/Remove Status area displays the status of the examination, series, and images.
Jobs are performed in a first come first served basis.
When the data has been successfully transferred to the Local DB, the archive device label is displayed in the Patient List series Archived column.
When the data has been successfully transferred to a network node, the label of the node is displayed in the Patient List series Transferred column.
Roll the cursor over the names displayed in the Archived or Transferred columns to see more details.


 to open the Image Management work area.
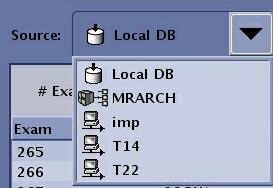
 to open the Filter Data screen.
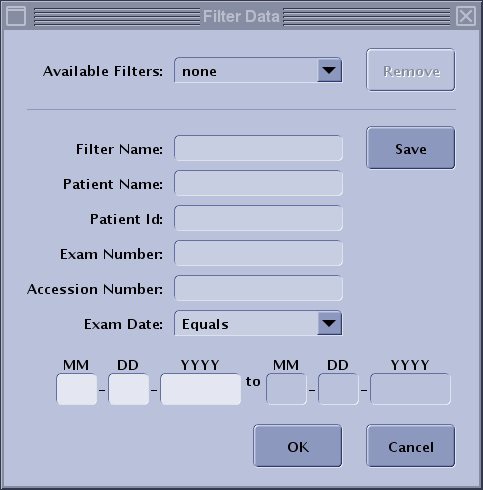
 .
. The Job Manager icon displays the network status of the examination, series, and images currently being networked and the destination location.
 The Archive/Remove Status area displays the status of the examination, series, and images.