Use these steps to add a new series to a patient's exam.
Step-by-step instructions
Open the MR General Review.
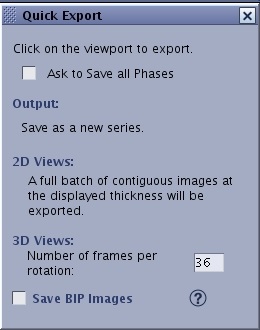
From the Export Toolbar, click the Export icon () to view the Quick Export screen.
Alternatively, press the F4 keyboard button to perform a Quick Export of the active viewport. Figure 1. Quick Export screen
Click the Ask to Save all Phases option button for a Reformat application if you want all phases of a multi-phase series saved to the exam.
For 3D Views, enter a value in the Number of frames per rotation text field.
Click the Save BIP Images checkbox so that the data set can be viewed by other software applications such as surgical planning systems. For details, see Export BIP images.
Click the desired viewport to make it active.
Any viewport can be selected for Quick Export. The image in the viewport will be exported to the patient list, which means a new series is added to the patient's exam.
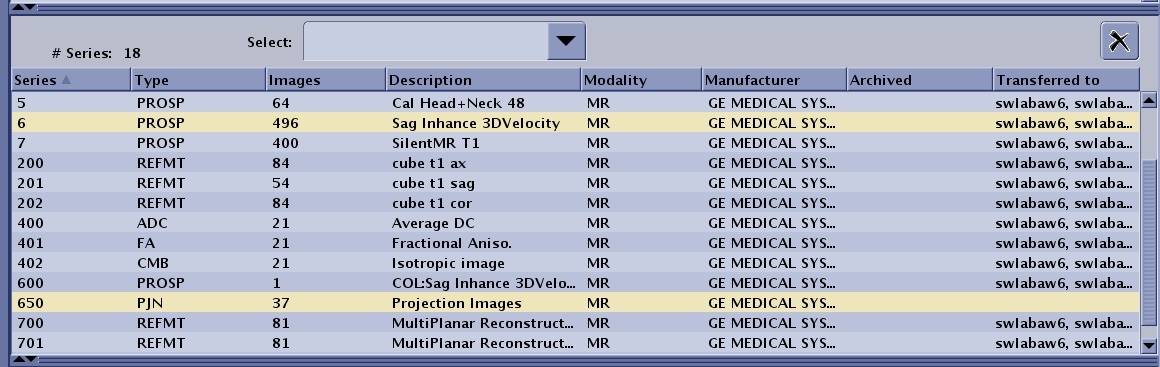
The new content is added to the patient's exam as series N*100, where N is the original series number. Figure 2. Series 650 is the exported file from series 6. The Description content is the text entered during the export process.


 ) to view the Quick Export screen.Alternatively, press the F4 keyboard button to perform a Quick Export of the active viewport.