About this task
Use these steps to connect a coil to the MR system.Step-by-step instructions
- Place the lock face in the unlock position.
- Insert the coil plug into the desired port.
- The coil label identifies valid port options.
- Voyager coil ports:
- Transmit/receive coils can only be plugged into Port 2 (labeled P2).
Figure 1. Head end of table with two (P1 and P2) coil ports and foot end has one coil port (P4)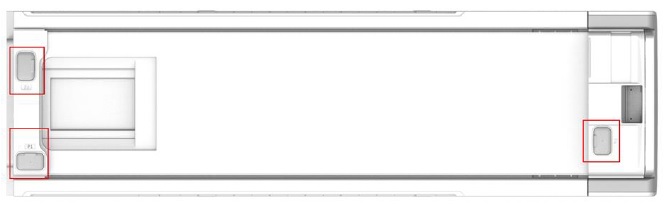
- Lock the connector plug by rotating the spindle handle until the Lock symbol is visible.
Figure 2. P connector, 1 = unlock, 2 = lock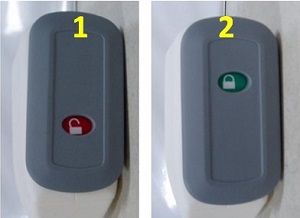
- On the IRD, select the coil tab and confirm that the coil port is green.

