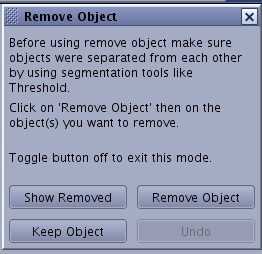
From the Remove Objects screen, click Remove Object.
Place cursor (shaped like a cross) over the object to be removed and click.
Note: that you can click Undo to undo your last action.
Remove Object deletes from the view everything that is physically connected to one or more voxels. You can remove multiple objects from a view as long as they are not connected to any other voxel. After the data has been removed, you can continue to narrow the definition of the region of interest using other segmentation tools such as scalpel, paint, threshold, etc.
Click Remove Object to deactivate the function.
To show removed objects, follow these steps.
After you have removed an object as described in the procedure above, click Show Removed to replace the object(s) currently displayed in the viewport with the objects that had previously been removed.
This becomes the current 3D view, and it is the previous feature of interest that is removed from view.
Click Show Removed to deactivate the function.
To keep all pixels with the selected intensity, place the cursor over pixels that represent the pixel intensities you want to keep and click Keep Object. All other pixels are discarded.


 to view the Remove Object screen.